|
Home
About This Site
Air Cleaners
Audio
Carburetors
Charging System
Chassis
Cooling System
Decoding
Detailing Center
Diecast Cars
Differential
Documentation
Driveshaft
Engine Bay Detail
Engine Brackets
Engine - External
Engine - Internal
Engine Tags
Exhaust
Exterior
Favorite Links
Fuel System
Gallery 1
Gallery 2
Gallery 3
Gallery 4
Gallery 5
Gallery 6
Gallery 7
Gallery 8
Gallery 9
Gallery 10
Gallery 11
Gallery 12
Gallery 14
Gallery 15
Gallery 16
Gallery - Photos from For Sale Ads
Heater & A/C
Ignition
Interior
Junkyard Cars
Memorabilia
Mustang Monthly Article Index
Oil Cooler
Paint Info
Parts Sources
Performance Data
Photography
Pulleys/Belts
Registry 71 429 Cougar
Registry 71 429 Mustang
Smog/Emissions
Special Topic
Special Topics 2
Starting System
Statistics
Steering
Suspension
Tech Writeup Index
Transmission
T-Shirts
Trunk
Underhood Component Coatings
Videos
Vintage Ads
Under Hood Non Engine Components
Wheels/Tires
Index
| |
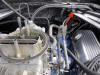
ENGINE COMPARTMENTS
Below are the four basic 429 engine packages. The 429 Mustang
came with either a "C" or "J" code as the 5th digit of the
VIN meaning either a 429 CJ or SCJ engine. The C meant a 429 CJ or SCJ without
Ram Air and the J meant a 429 CJ or SCJ with Ram Air.
(Note: Click thumbnails to enlarge pictures)
|
71 429 Mustang |
|
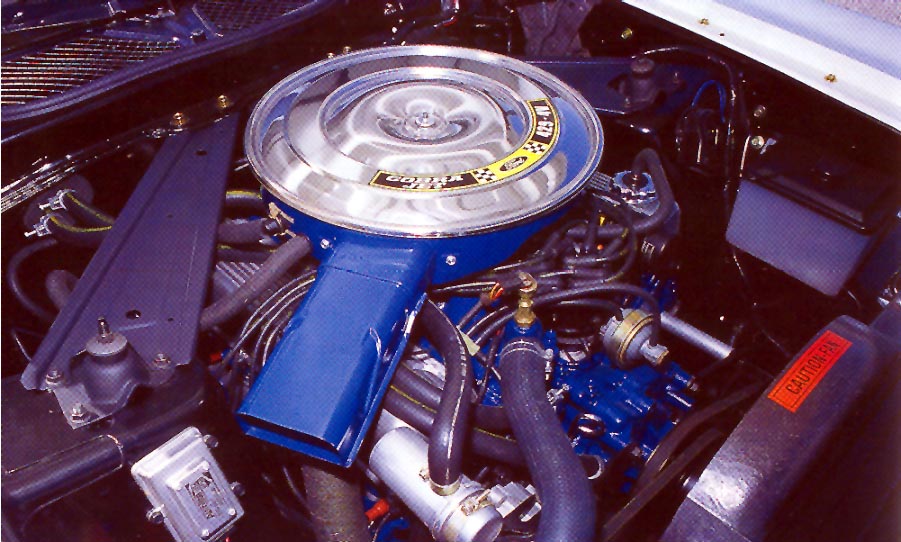
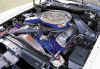
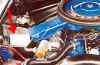
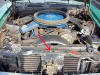
429 CJ-R Engine Compartment
This is the J-code with the 429 Cobra Jet engine with
Ram Air.
|
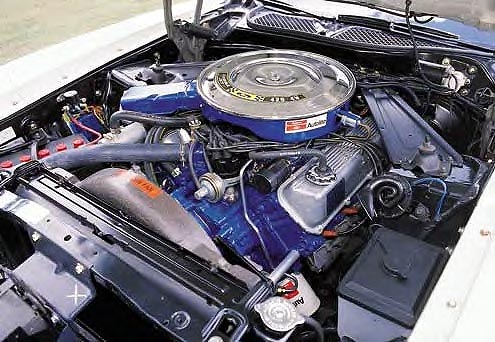
429 SCJ-R Engine Compartment
This is the J-code with the 429 Super Cobra Jet
engine with Ram Air.
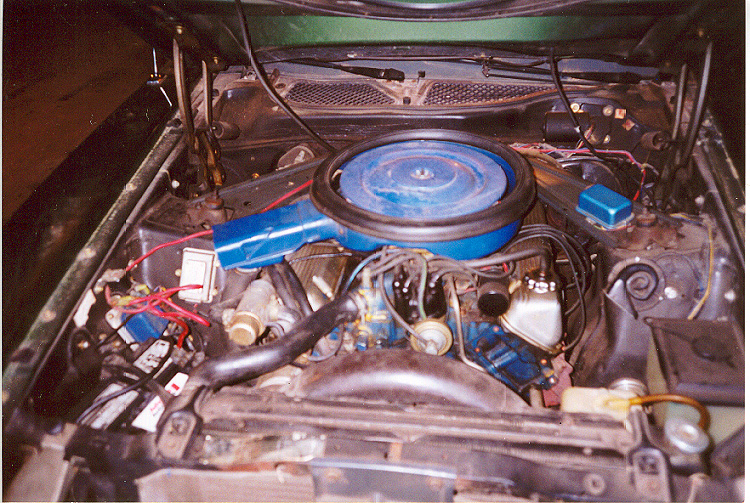
|
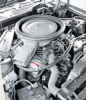
|
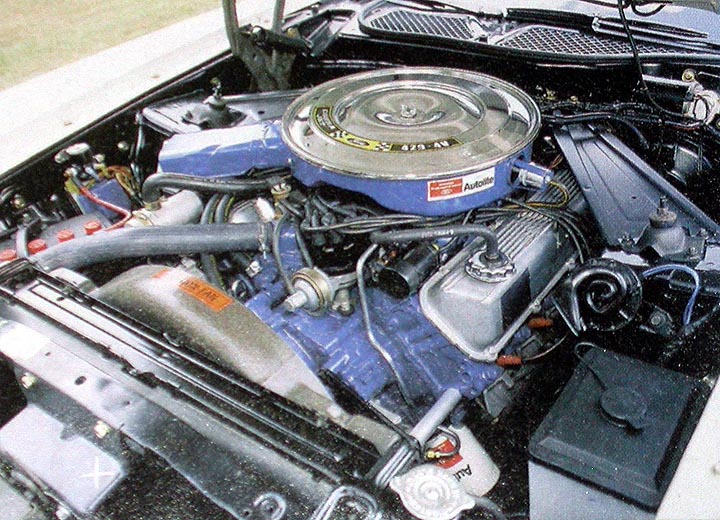
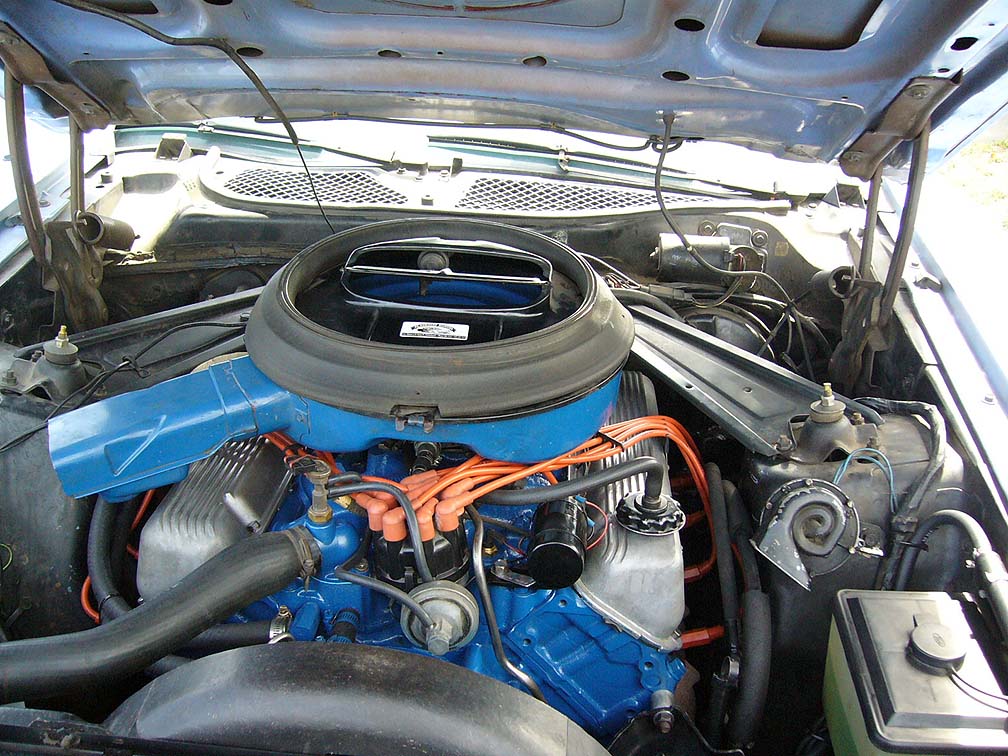
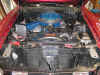
429 CJ Engine
Compartment
This is the C-code with the 429 Cobra Jet engine (non
Ram Air).
|


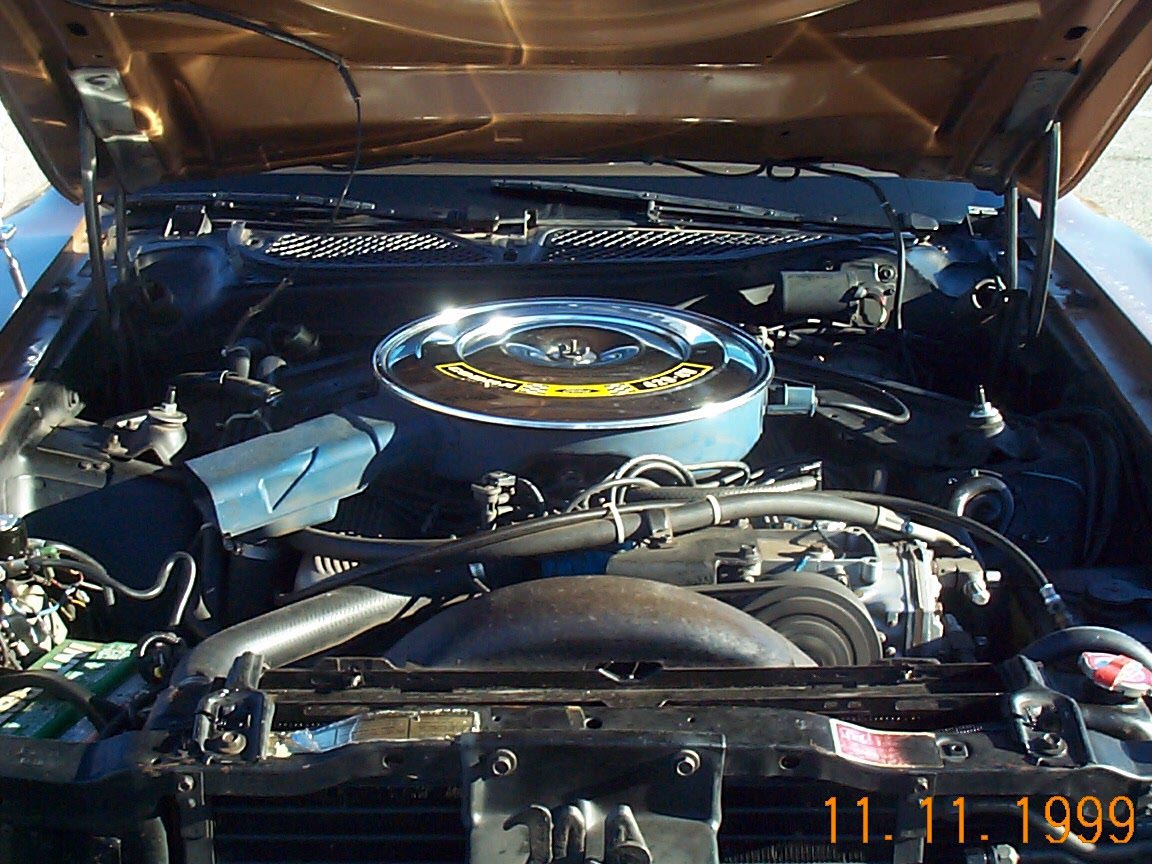
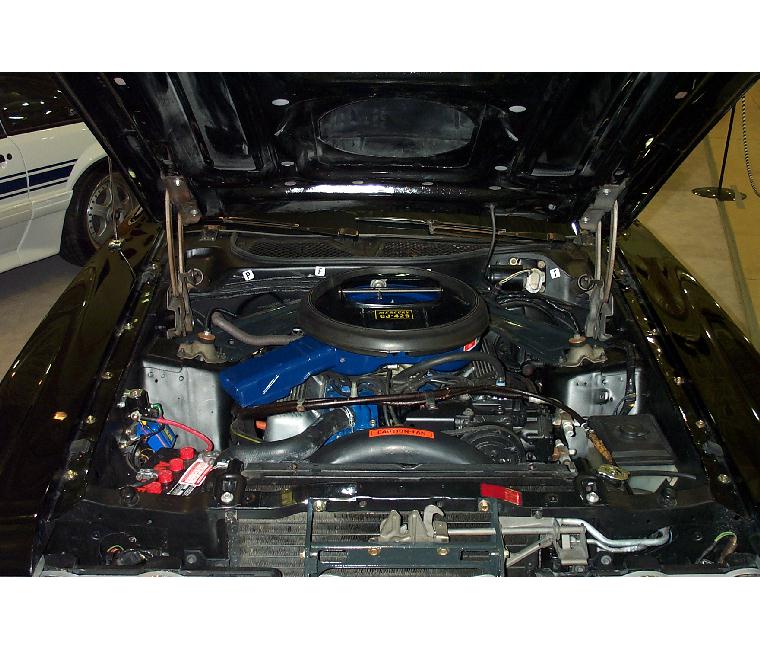
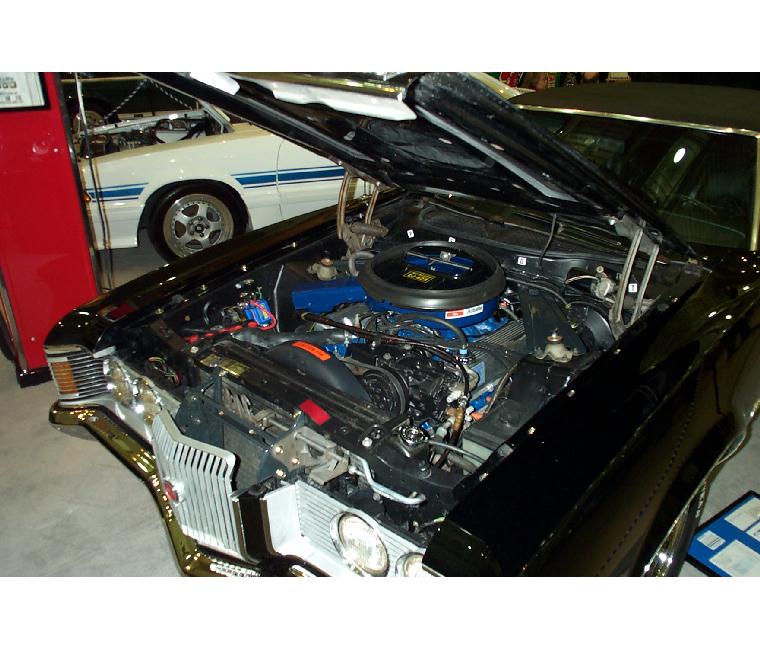
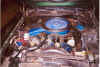
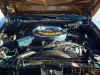
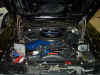
429 SCJ Engine Compartment
This is the C-code with the 429 Super Cobra Jet
engine (non Ram Air). Duplicate photo at right is larger version for
better detail.
|
|
71 429 Cougar |

 429 CJ-R Engine Compartment
This is the J-code with the 429 Cobra Jet engine with
Ram Air.
|
|
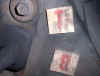
Engine Compartment Markings/Decals |
|
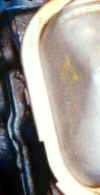


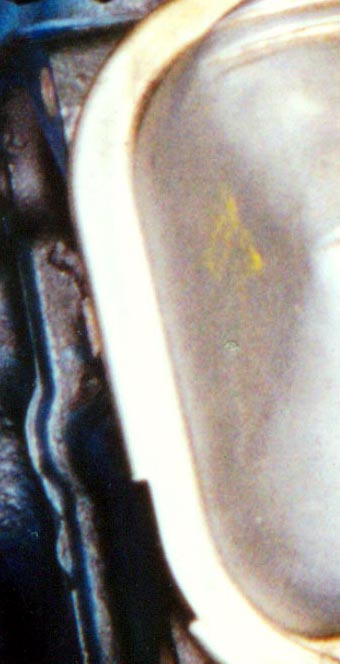
Valve Cover "OK"
If you look closely, you can see the remains of the yellow factory
"OK" stamp on the front surface of the driver's side valve cover
on this original 22,000 mile SCJ Mustang (also, the remains of a second
sample we found on a 429 CJ Cougar and also an NOS 429 CJ are shown below). A template (of correct font) for anyone wanting to
reproduce this mark is shown at center. Size the OK letters to 3/4"
wide by 3/4" tall. Print it out and take it to a rubber stamp shop to
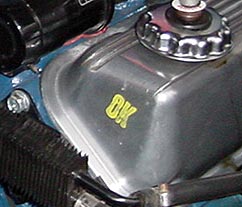
have a stamp made. Use yellow Acrylic Paint as shown on the original above. At
center right
is the "OK" stamp mark we reproduced with a rubber stamp based on the template at
center left using the 3/4" size and the shade of yellow of the original and
then stamped
onto a 429 Mustang valve cover. Our rubber stamp we made is at far right.
  |
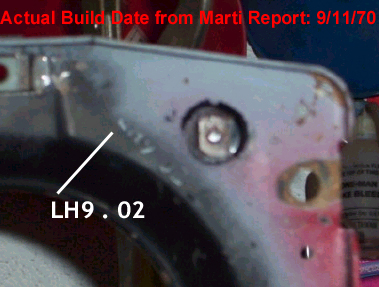
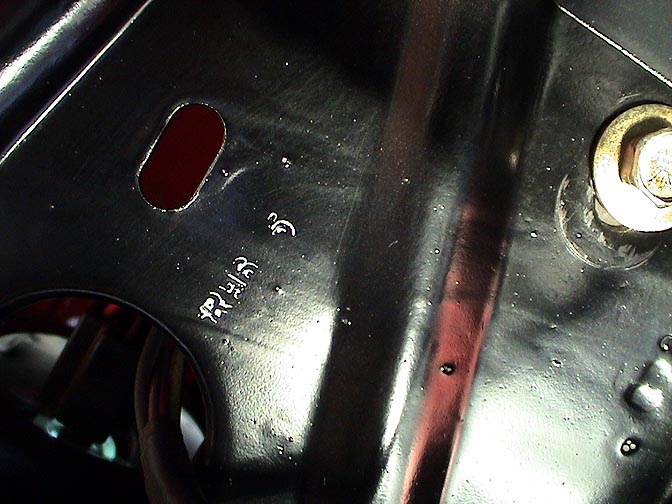
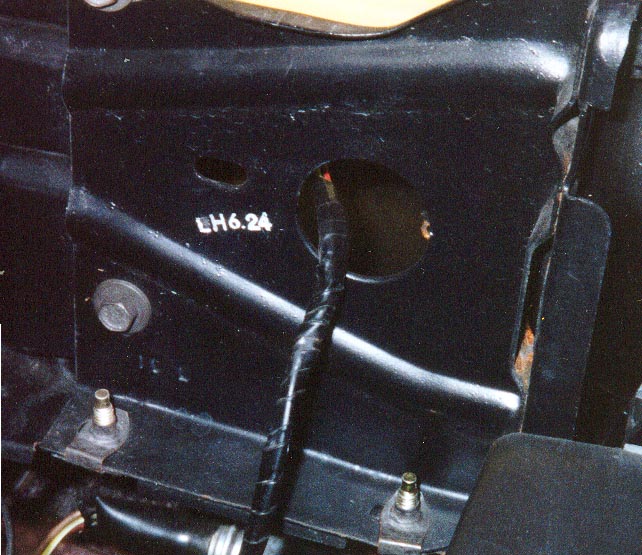
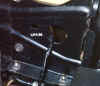
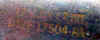
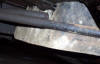
Headlight Housing Date Codes
|
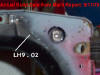

The date code in the photo above is LH9.02 which
decodes as; Left Hand (headlight support), September 2, (1970). The
actual build date of this car from the Marti report was September 11,
1970.
|
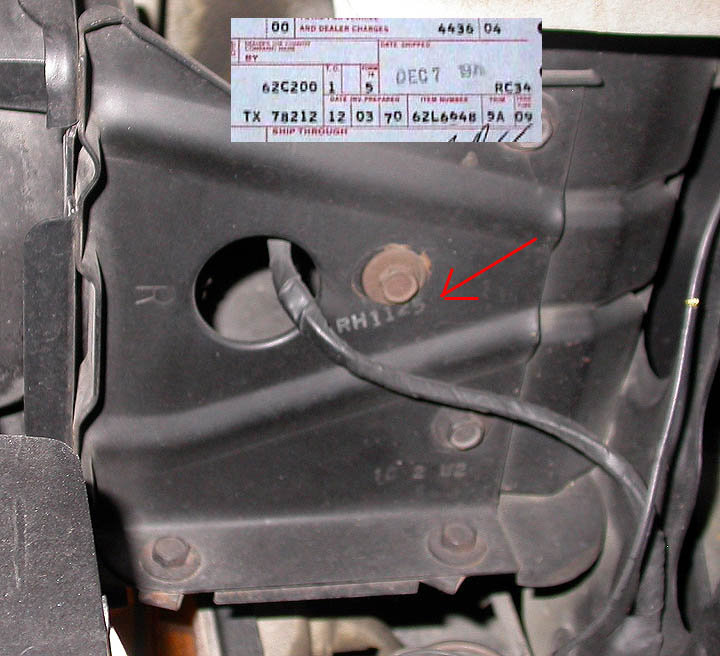
The date code in the photo above is RH1125 which
decodes as; Right Hand (headlight support), November 25, (1970). The
build date of this car from the invoice was December 3, 1970. |
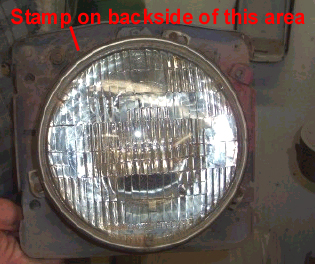
Date codes were stamped on each front
headlight support. Samples of factory stampings on two different 71 429
Mustangs show the stampings could have been either on the back of the headlight
support (top left) or on the side support (top right). It was originally thought that these stamps were the actual vehicle build date, however, the
samples above (one with Marti Report determined build date, other with the invoice
build date inset), show that the build date was actually 6 to 7 business
days after the dates stamped on the headlight supports. More research is needed to
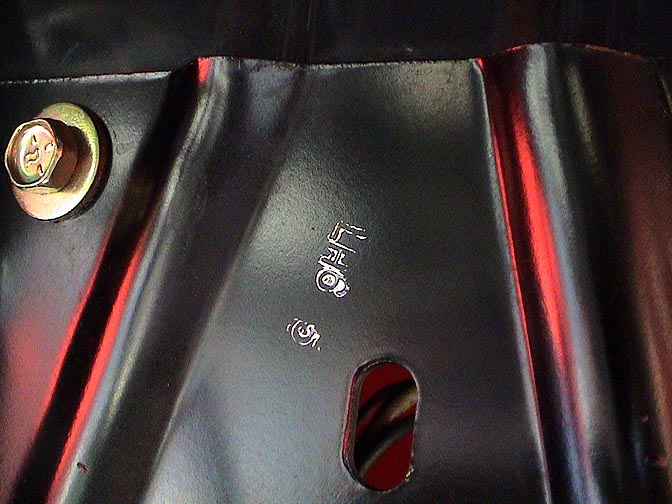
understand what this date represents. Shown below are these same
type of date stamps on an unrestored 72 Mach
1 and at bottom, the single photo shows this mark reproduced on Jeff Ford's
72 Lazarus Mach 1.

 |
|
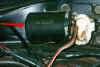 
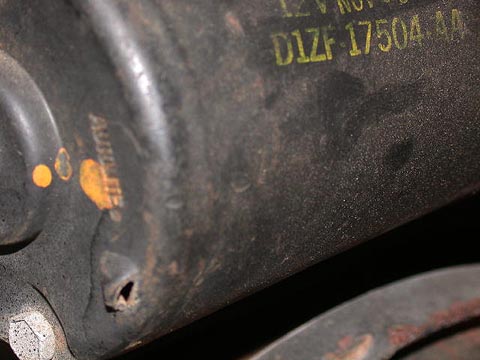
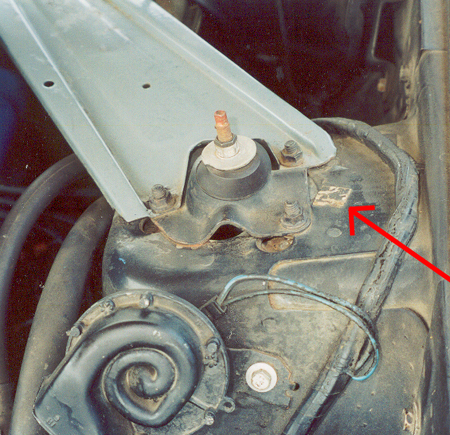
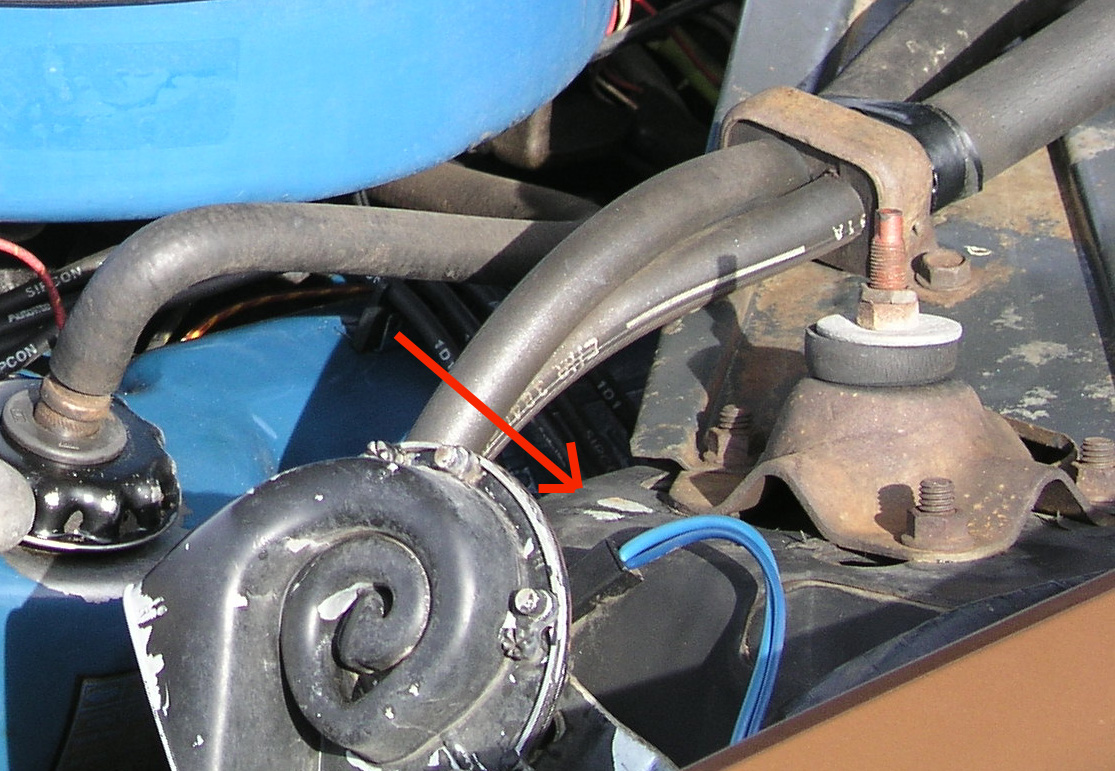
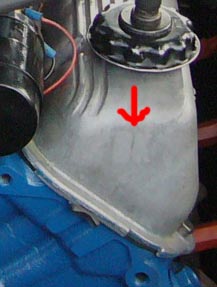
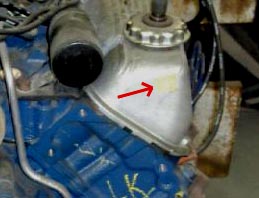
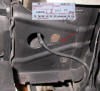
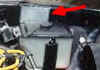
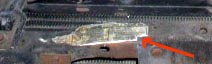
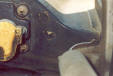
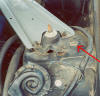
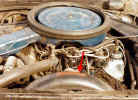
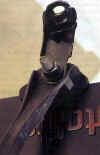
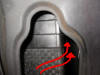
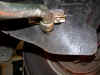
Wiper Motor
This is an original wiper motor at left. Note the yellow part
number (or could be white - depending on motor supplier) and date stamp as well as the colors of the components. A
beautifully restored motor is shown center. Also,
a yellow paint dab was placed on the end of the
housing (red arrow) as shown in the photo at right. A
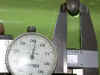
closeup of the date code/part number is shown below. A view with a
scale is shown below for those who want to make a stamp to reproduce this
mark. Two members wiper motor date codes were recently checked against the
build date of their cars and were found to precede the car's build date by
6 to 8 days.
|
|
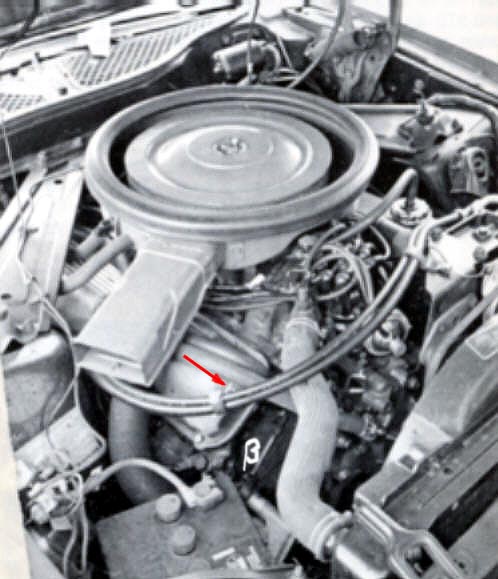
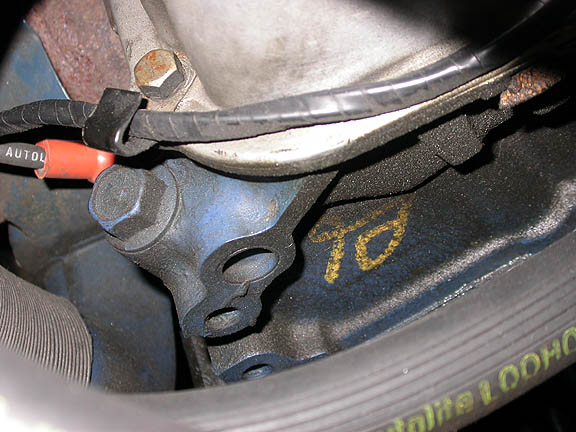
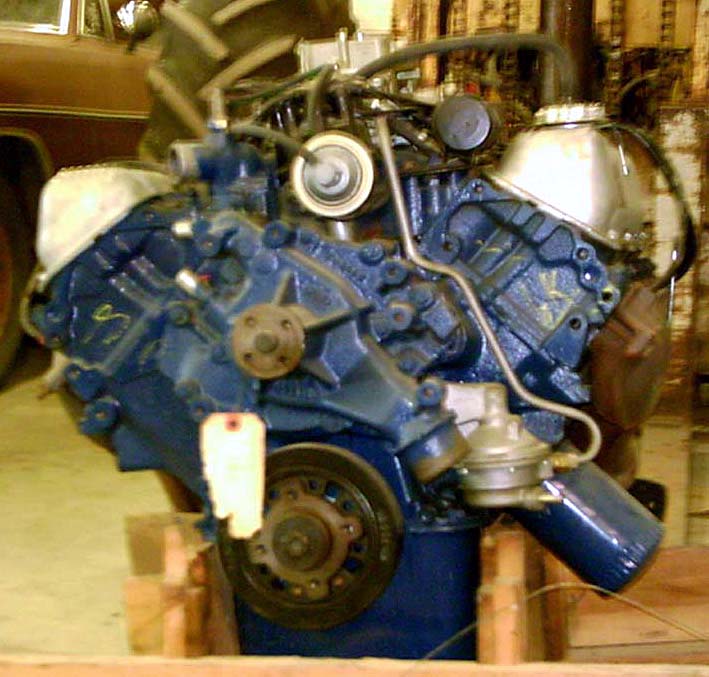
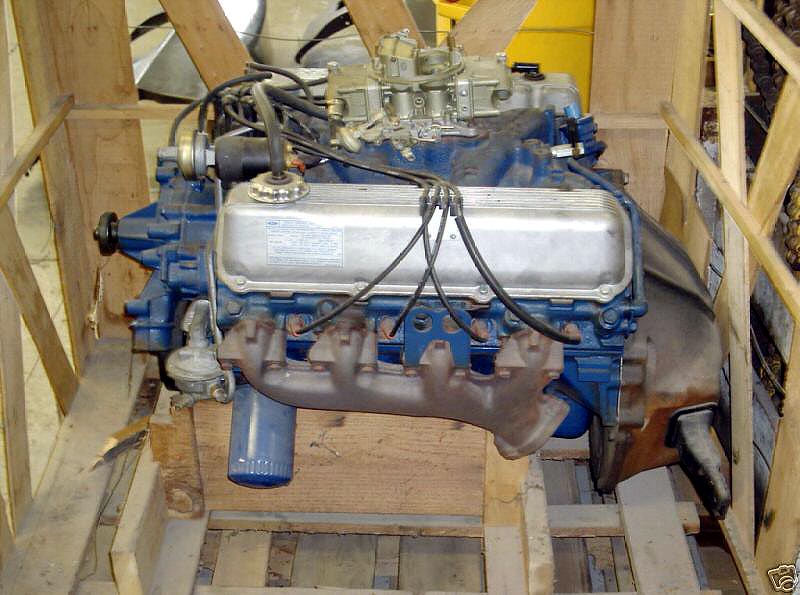
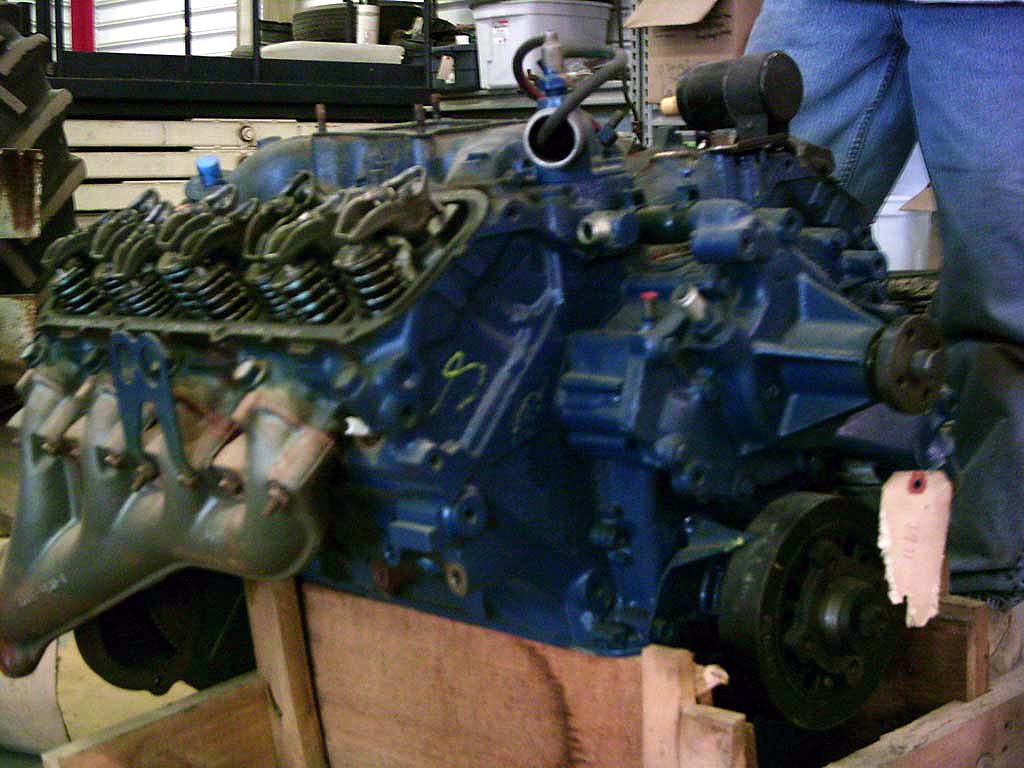
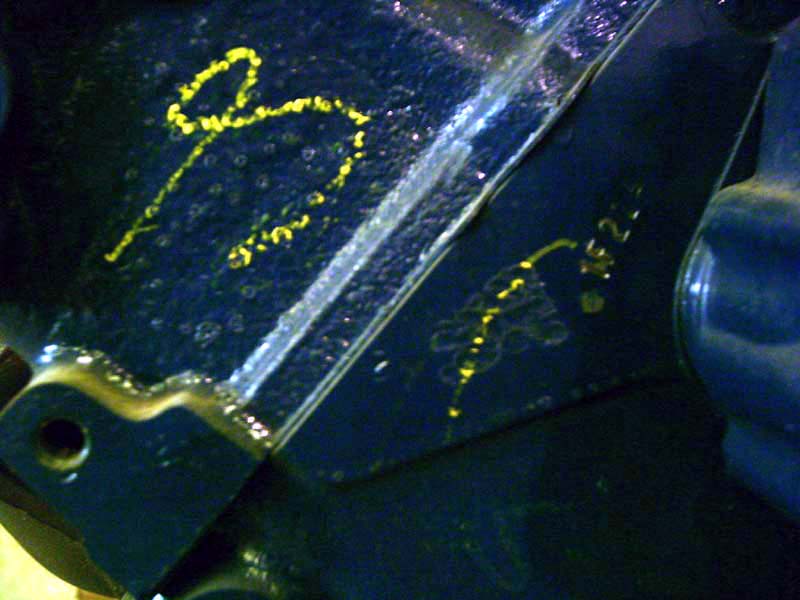
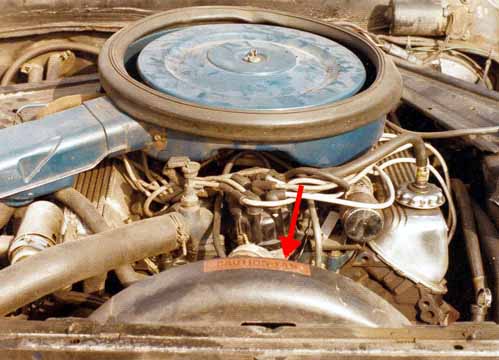
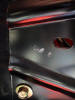
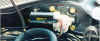
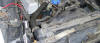
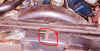
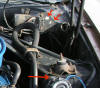
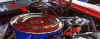
Engine Inspection Marks
In this period photo of a 71 429 Mustang at left, there
appears to be a
"B" marked on
the front of the passenger side head (I have enhanced it because it was difficult to
make out in our scan). The picture at center also shows a mark in this
same place (yellow crayon) on
a 1970 N code 429 in a Cyclone. The picture at right shows a mark
found on a 71 429 CJ Mach 1. We speculate that these marks may be
inspector initials. Below are some additional
photos we received (thanks Jake from
ProBodyShop.com !) of an original 71 429 SCJ factory replacement engine. Note the yellow crayon markings on the
heads on both the front and rear of engine; Front of Block
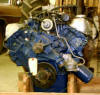 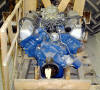
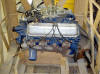
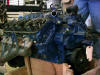
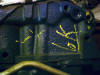
Rear of Block near VIN Stamping  |

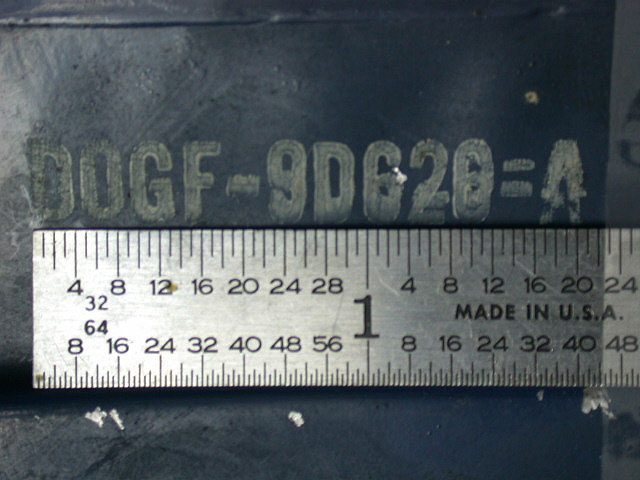
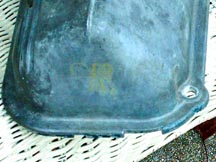
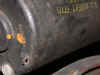
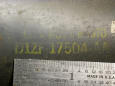
 Snorkel Part Number
The part number for the snorkel (D0GF-9D626-) is
stamped in white ink on the underside as shown. The photo at right shows a
closeup with a scale in case you would like to make a stamp to reproduce
this.
|
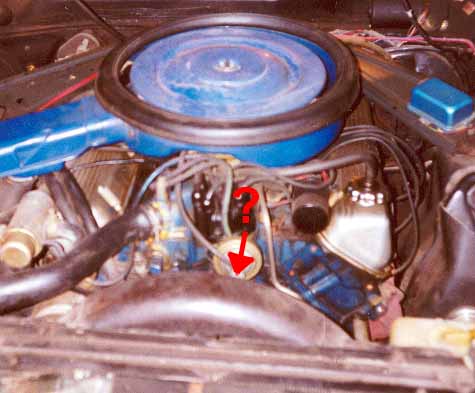
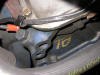
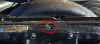
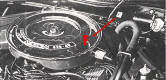
What about the Chalk "X" on the Coil???

If you have checked out concours Mustangs of many
different years on the showfield, you have doubtless seen lots of coils
with the white chalk "X" on the end as shown in the photo above. So did
the 71 429 Mustang ignition coil have the chalk "X" marked on it? Based on
our evaluation to date of low mileage, unrestored 429 CJ/SCJ
Mustangs, the answer appears to be no. Two example photos below show no
indication of an X.

|
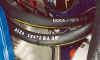
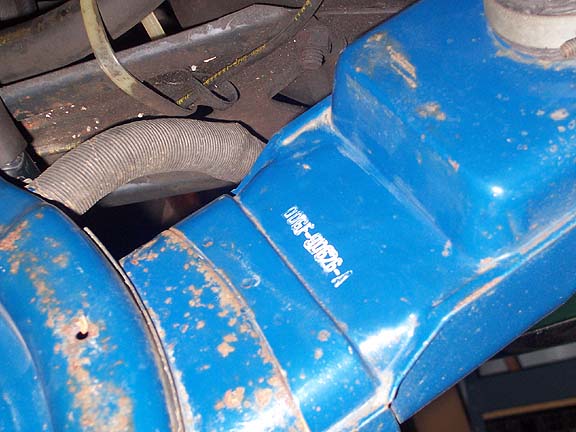
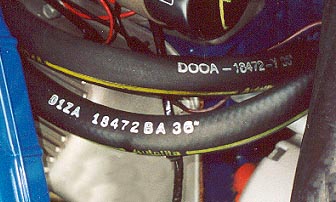
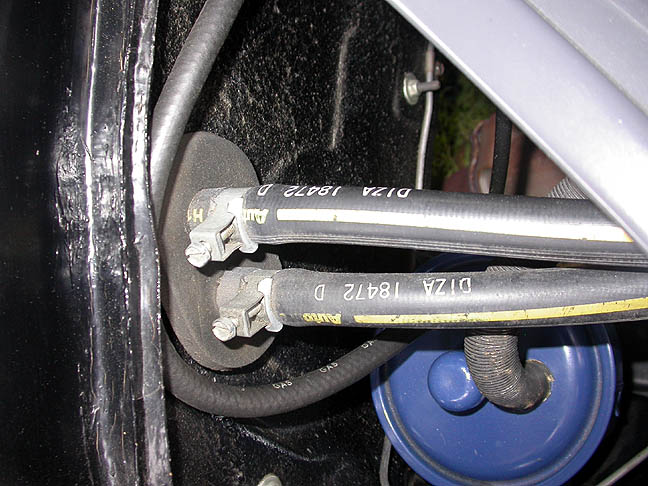
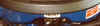
 In addition to the yellow stripe/"AUTOLITE"
lettering, the original heater hoses bore the part numbers. Examples from
a Boss 351 shown above D0OA-18472- or D1ZA-18472- were stamped in white ink. The reproduction heater hoses
currently being sold do not have these parts numbers, so you will have to
be creative if you would like to add them to your hoses.
|
Front Decal and Element Decal
"FRONT" stickers often show up on 429 Mustang
air cleaners. Research to-date suggests this sticker is not correct for
the 71 429 Mustang air cleaner. They appear to have been only used on 65 -
68 Mustang air cleaners. However, since this sticker comes in a 12 piece
kit sold for "1971 Mustangs", a lot of people think they are
correct and put them on. The air cleaner filter sticker (orange/white)
sticker shown above, did come on the 71 Mustang air cleaner. The location
shown above is correct for this sticker.
|
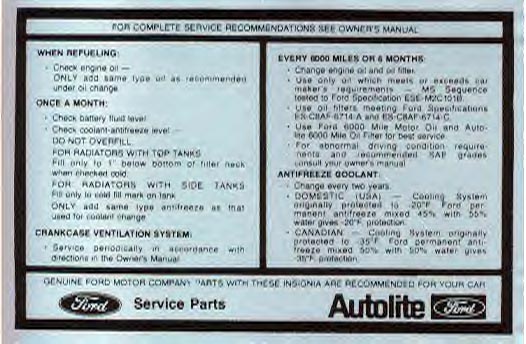
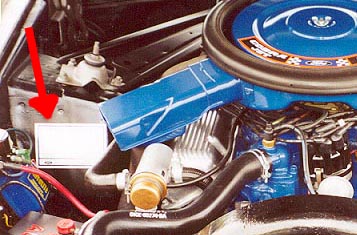
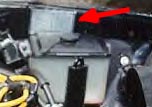
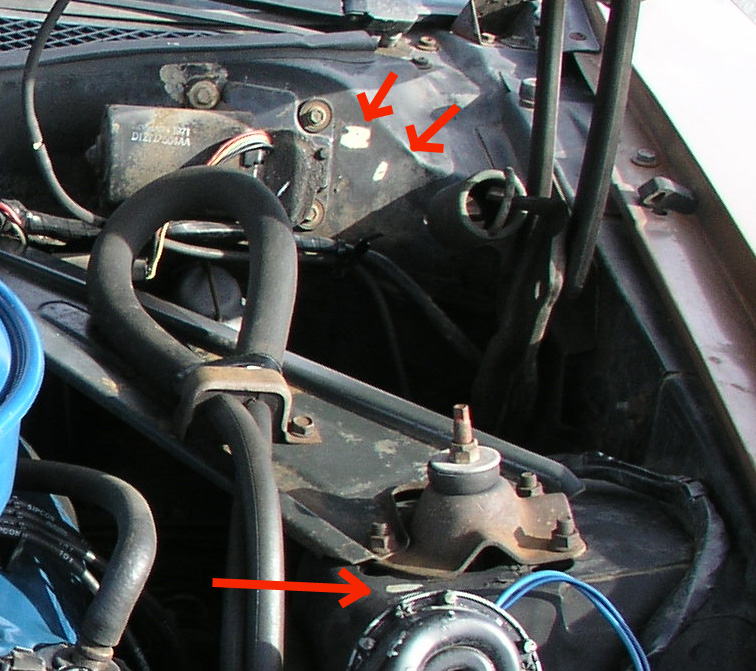
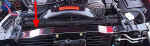
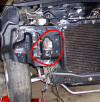
1970 Service Spec Decal |
 '70 sticker location without rev limiter
was on passenger side shock tower. Photo at right is from original
engine compartment taken in 1974 confirming this location. |
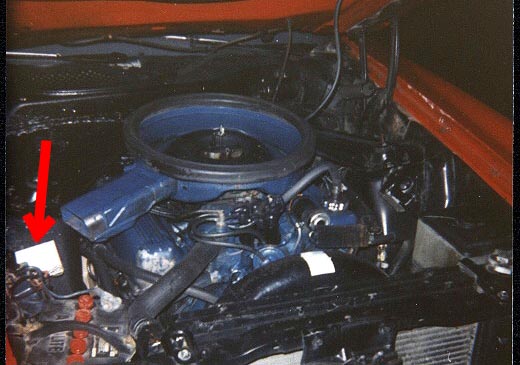
'70 sticker location with rev limiter. |
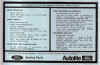
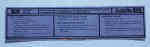
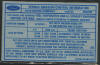
Service Spec Decal
There were two different Service Spec Decals used on 71
Mustangs depending on when the car was built. The 1971 Mustangs built in
the Fall of 1970 used the 1970 Service Spec sticker (as shown above). The
70 sticker was placed on the passenger side shock tower unless the car had
a rev limiter - then it was placed above windshield washer tank. Sometime
between* the last few days of September and the 3rd week of
October. 1970, the Service Spec sticker was changed to the 1971 version
(shown in next section below) and placed on the radiator support.
*Group member Mitch Lewis was able to help us narrow
down the changeover time with his September 30th built vehicle (lower
left) and his October 20th 1970 built vehicle (lower right)
showing the change occurred in this timeframe.

|
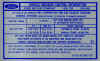
'71 Service Spec Decal and correct location on
radiator support. Note how the hood latch support bracket goes on
top of the decal on an original car.
|
|
|
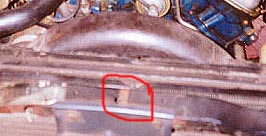
Build Sheet Tape Mark
In the two photos of original cars above you can see
the remnants of a piece of masking tape at the center of the top of the
radiator support. On original cars, the tape is usually still left there
or the paint was removed when it was peeled off. It is believed that this
piece of tape was used to affix one of the build sheets as the car went
down the assembly line.
|

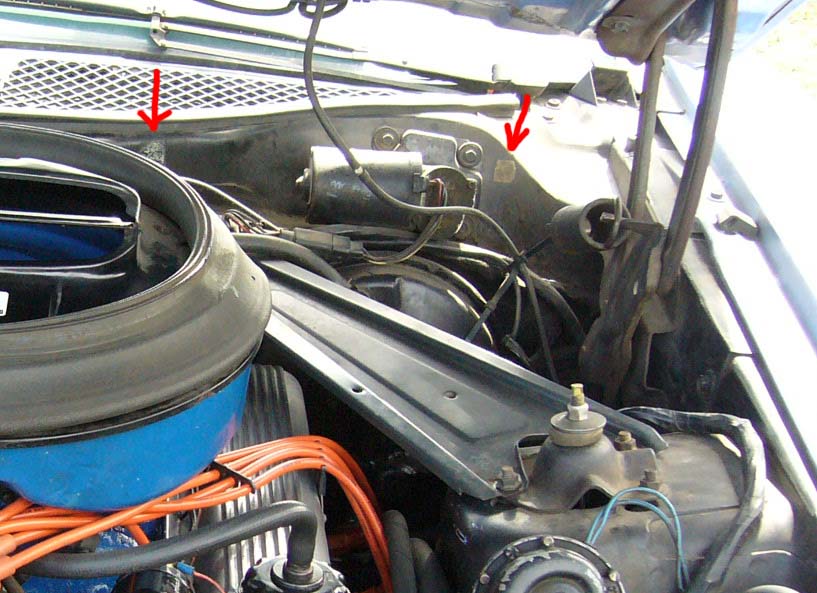
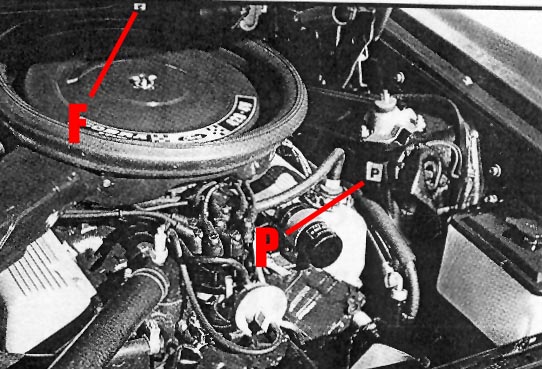
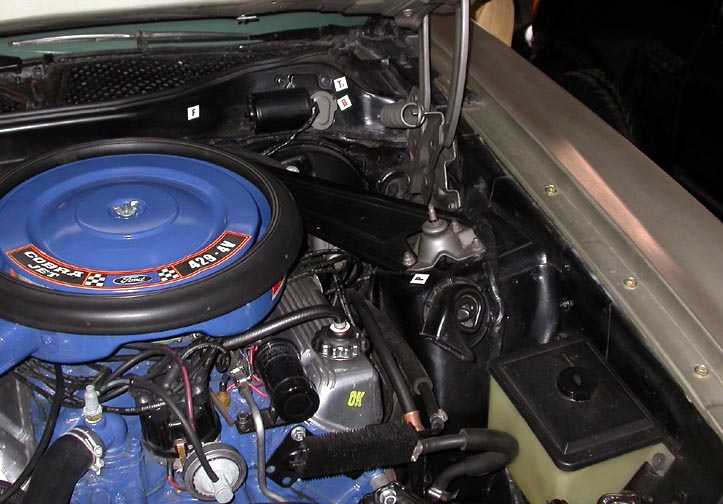
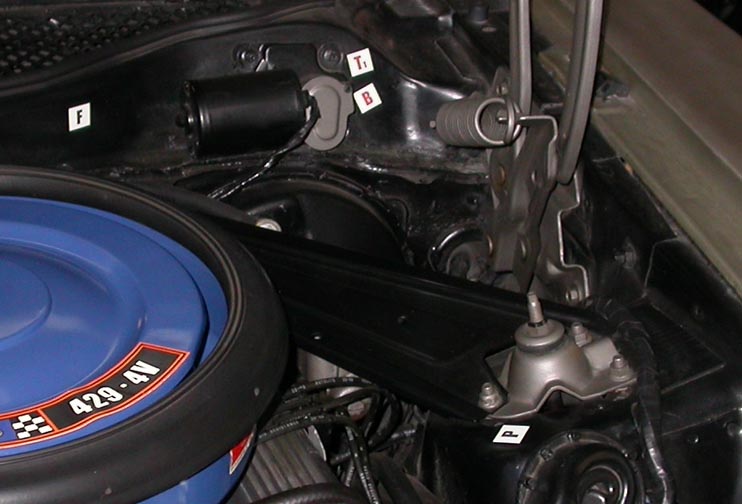
Inspection Decals
Four Inspection Decals were used in the 71 Mustang
engine compartment - P, B, T and F. It is likely that the P stood
for Paint, the B for Body, the T for Trim and the F
for Final as these are the names of the major areas in an auto
assembly plant. The T and B letter decals are red while the P and F are
black. The
following is our recommended placement* for these decals;
|

B and T Location
B and T
went the right of the wiper motor
|
|

F Location
F decal went to the left of
wiper motor
|
|

P Location
P decal was placed
in the top horn and the upper shock mount area.
|
* Note that it is certainly possible that these decals
were placed in other locations in the engine compartment as well
(different assembly plants (Dearborn/Metuchen), different assembly line workers, etc.). However,
we are presenting the locations we have observed most often for them on multiple
original and correctly restored MCA concours gold 71 Mustangs.
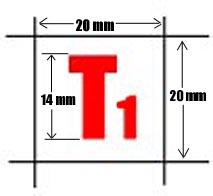
Make Your Own
Inspection Decals
Inspection Decal Template
Most of the reproduction Inspection Decals sold at
Mustang supply-houses are incorrect for the 71 Mustang (wrong size, font,
color, rounded instead of square edges), so we have made the template
below to be as close as possible to the originals based on careful
examination of original '71 Mustang decals. To make your own decals;
1) Click on the template below, which will open a
Microsoft Word file which you then save to your computer.

2) From Microsoft Word, open file
InspectionTemplate2.doc. It is already sized to print out each
letter to the correct 14 mm height. Load your printer with white sheet
adhesive label paper (example - Avery #6573) and print out.
3) Trim each of your 4 Inspection Decals to be 20 mm by
20 mm as shown in the diagram below. You may wish to cover them first with
clear plastic adhesive tape (I used shipping tape because it's wide
enough) to provide a water proof seal. Once done, add them to your engine
compartment as shown above!

Below - Engine Compartment with decals made using the
process above and located according to information presented above;
|

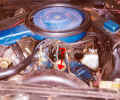
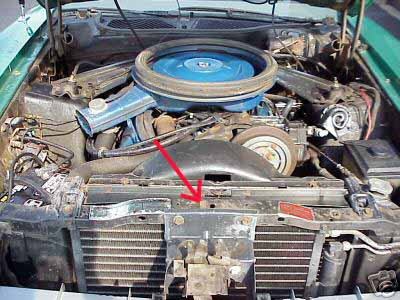
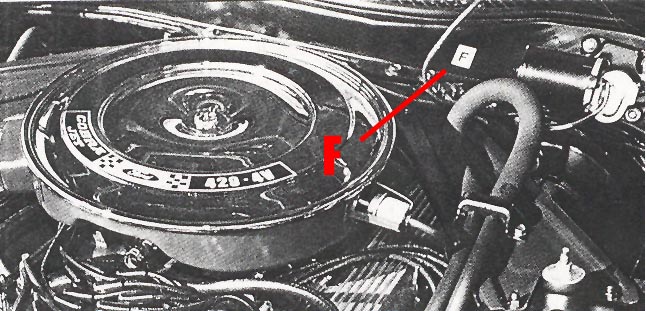
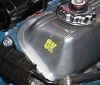
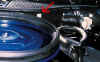
Caution Fan Decal
Did the 429 Mustang come from the factory with an
orange "Caution Fan" sticker on the fan shroud? The aftermarket
certainly has sold a lot of these stickers and many people have added
them, but is it right? The picture at above left is of a 429 SCJ engine
compartment taken in 1973 which does indeed show a "Caution Fan"
sticker. However, we also have the photo above right of an original,
unrestored, 22,000 mile SCJ engine compartment which does not have the
"Caution Fan" sticker. One theory we have bandied about is that
when Ford had problems with flex fan blades breaking off in the 70's that
perhaps they instructed dealers to install these stickers. Bottom line:
Don't know.
Update 3/28/09 from April 2009 Mustang
Monthly, Bob Perkins "Resto Roundup" column;
Original question was about presence of "Caution Fan" decal on the
1968 Mustang. Bob Perkins replied: "The "Caution
Fan" stickers were typically not installed on '68 Mustangs and Shelbys at
the assembly plant. More often, dealers added the sticker during dealer
prep. Service shrouds often had the sticker on them. There was more than
one Service Bulletin about the "Caution Fan" sticker telling dealers to
add them during warranty repairs or general service if they were missing.
Prior to 1972, the only factory photo showing a Mustang with the
sticker was of a Boss 429, which had a finger guard and not a full shroud......." |

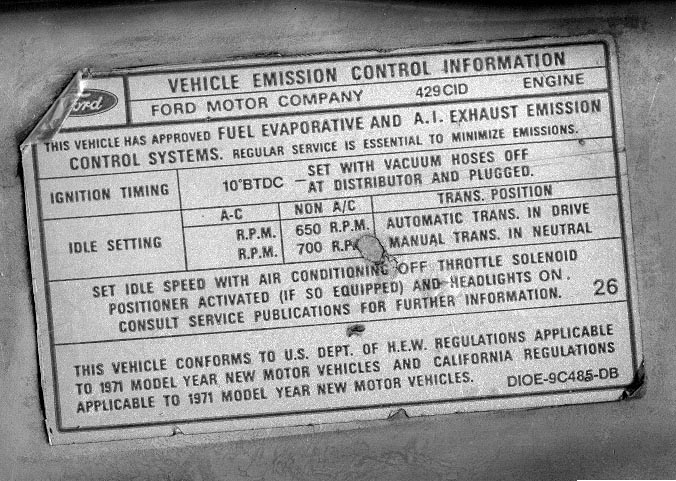
 SCJ
Emission Decal - Original at left in black & white photo. Osborn
has just reproduced this decal (shown at right) and it can be found in
the
Osborn catalog under #DF1601. |
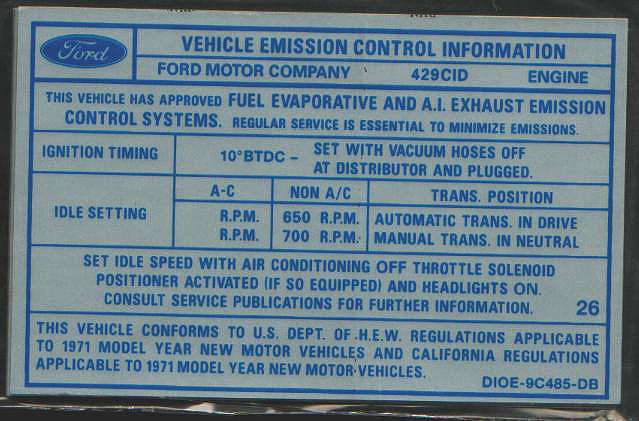
CJ Emission Decal (repro) |
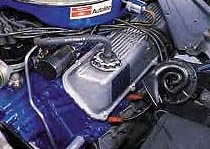
Installed view |
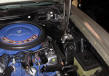
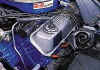
Valve Cover Emissions Decal
This is the emissions decal placed on the driver's side
valve cover. The 429 SCJ used the one at top left. Note the SCJ decal
lists "AI Exhaust Emission Control System". This refers to the
Thermactor (aka Smog) pump used on the SCJ while the CJ decal lists "EM"
in this same location for "Engine Management".
|
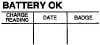
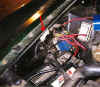
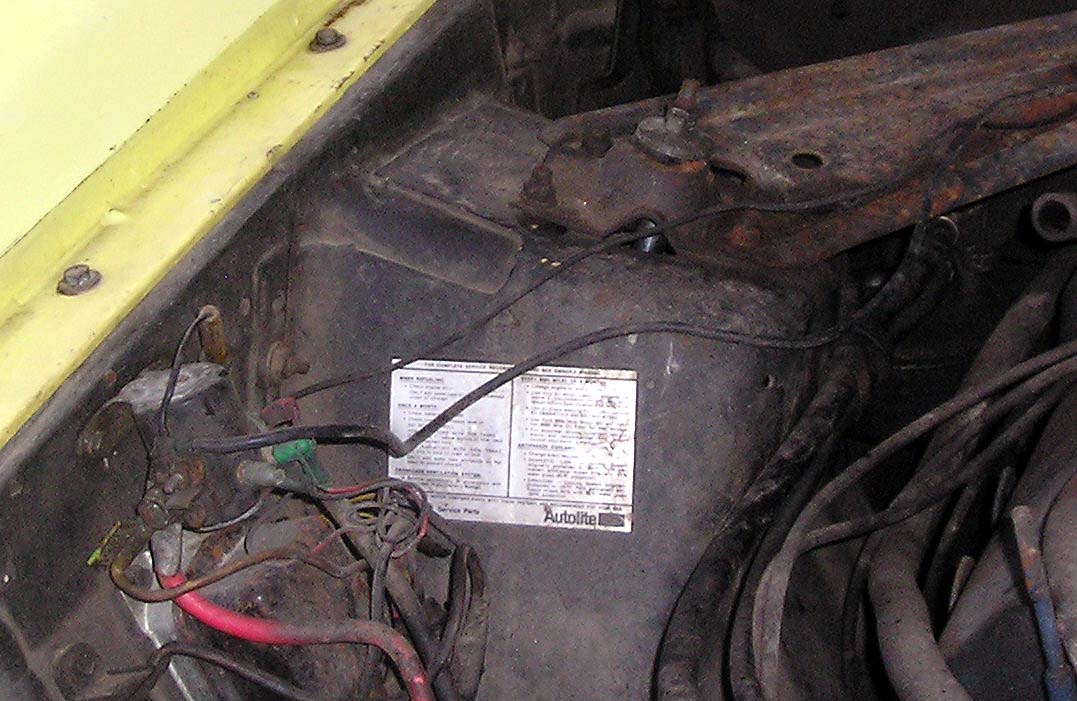
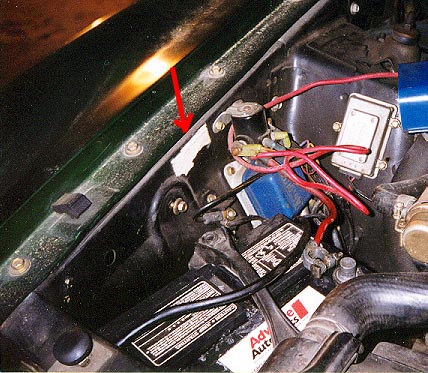
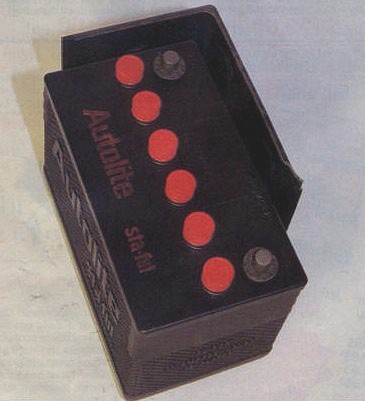
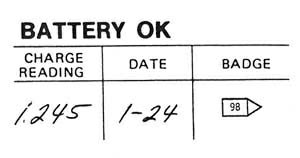
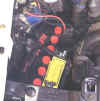
Battery OK Decal
This is the Battery OK decal. It was placed on the flat
area of the inner fender apron anywhere between the voltage regulator and
the radiator support. Want to get the correct markings on your
Battery OK decal?
Click this link to the special article on it by Mark Brandli:
The Story on the Battery
OK Decal
|

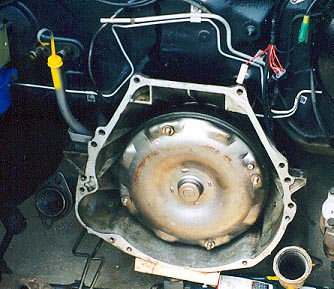
Trans Dipstick
The 429 CJ/SCJ C6 Trans dipstick was coded with yellow
paint as shown above.
|
|
Details of Underhood Components
|
|
Battery
At left is the battery hold-down used on the 71
Mustang/Cougar. At right is the special bracket that secures the battery
to the inner fender apron. It's Ford part # D0OZ-10A705-A.
|
 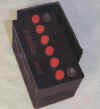
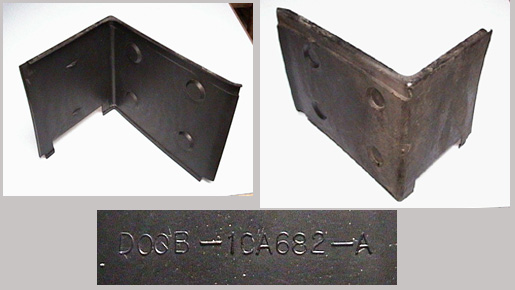
Battery
Ford used a battery shield on cars with air
conditioning or high performance engines (Boss 351 and 429 CJ/SCJ). The
purpose of the shield was to deflect engine compartment heat away from the
battery. Note how the shield is placed around the top and side of the
battery. The part number for this shield (now obsolete) is D0OB-10A682-A .
For 1971, Ford offered both a Group 24 and a 27 battery, but the 429
Mustang used only the 27F.

|

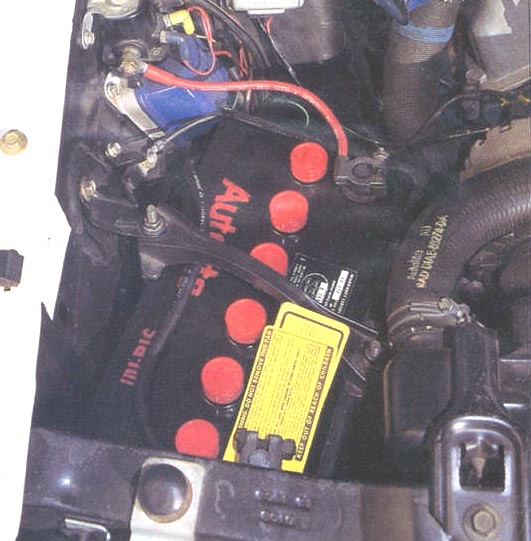
Battery
This 1971 Battery area is detailed to MCA concours
specifications. |
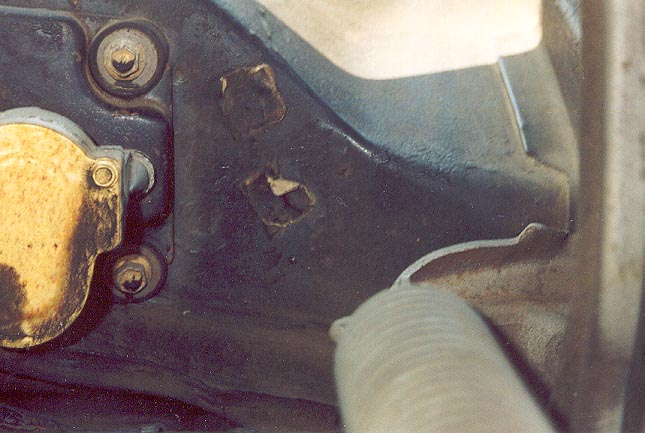
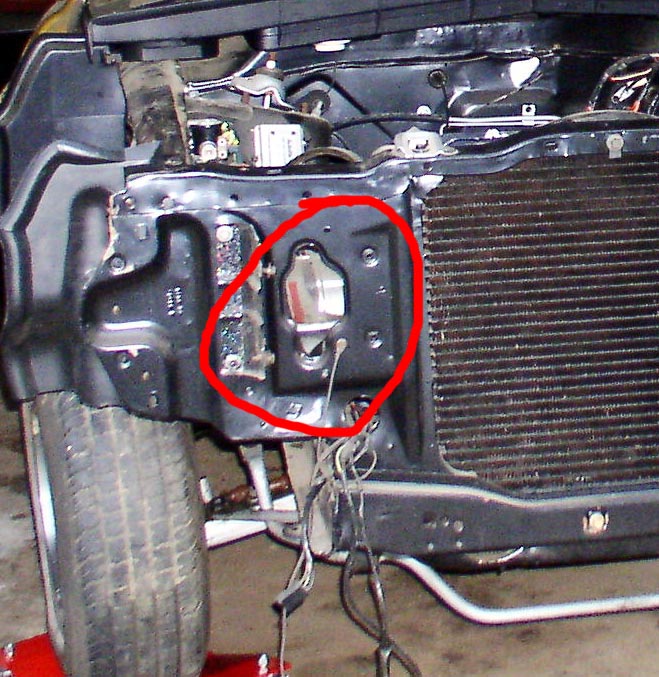
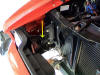
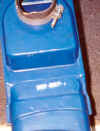
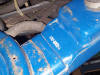
Battery Shield Airflow
The battery shield was not only designed to be a
barrier to engine compartment heat but also a "cooling jacket" for the
battery. Notice how Ford designed a clever little air scoop (top left and
left center photo) onto the leading edge of the shield. This scoop
captured fresh air through an opening in the radiator support sheet metal
(center right and right photos above) and ducted it through the air space
between the battery and shield to provide cooling.
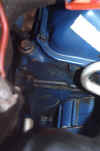
|

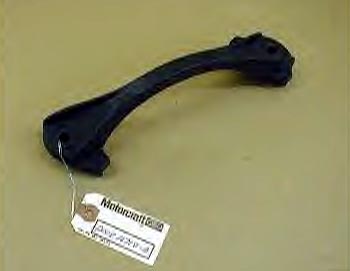
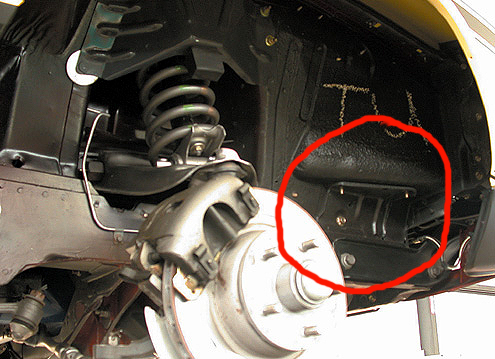
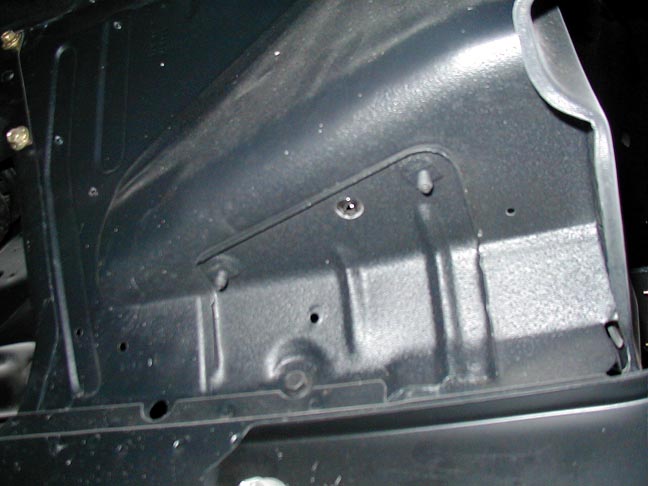
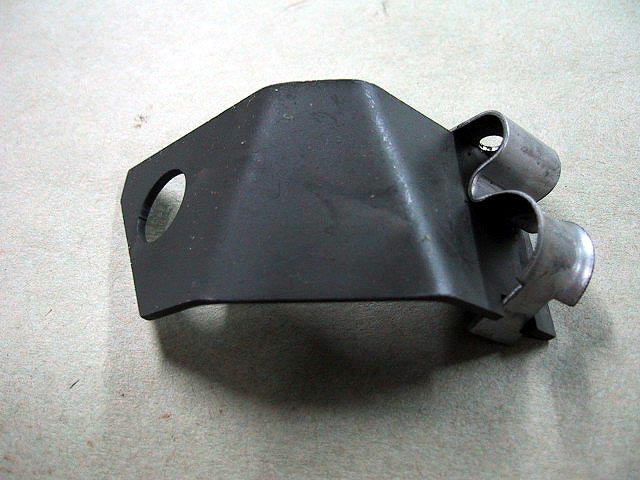
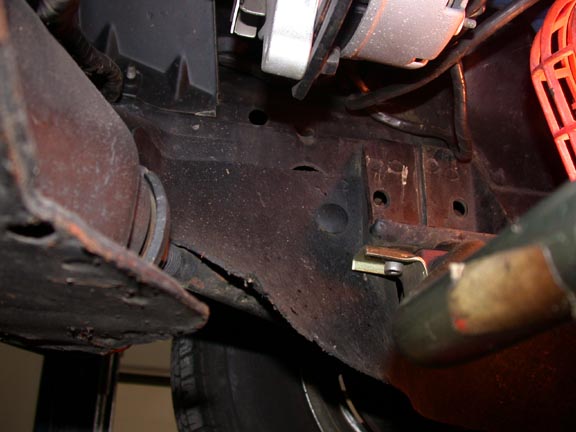
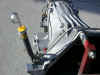
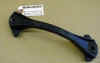
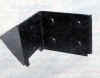
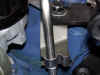
Battery Support Bracket
Although this page is Under Hood Detailing, this part
is actually an "under fender" part. It's located here since it's battery
related and this is the only place we cover the battery here on the
Megasite. The purpose of this bracket is to add structural support to the
battery tray that rests in the engine compartment on the inner fender.
With the substantial weight of the battery, it is understandable that Ford
would add this additional support. To our knowledge, this part is not yet
reproduced. If you need one, you'll have to find a good used piece or
fabricate your own.
|
|
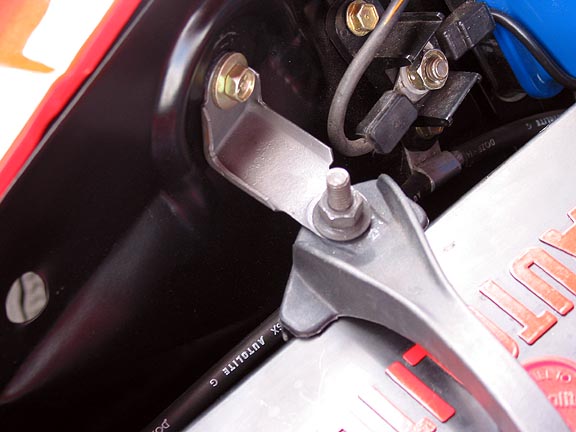
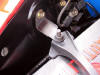
Fuel Line Bracket
The picture at left shows an installed view of a fuel
line bracket/clip. The MPC shows 71 429 CJ/SCJ Mustang and Cougar came with these
clips which bolted under the coil bracket (however, we have not found this
clip installed on an original car to date). This same clip design was
shared with the Boss 429. The picture at right is a detailed close up of
the clip.
|
|
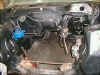

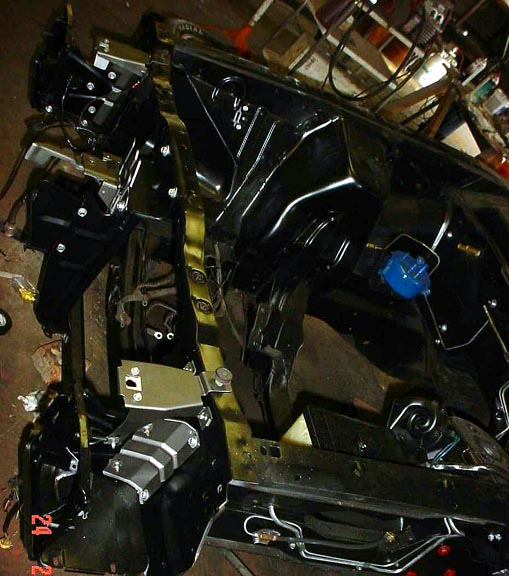
Engine Compartment Photos
|

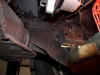
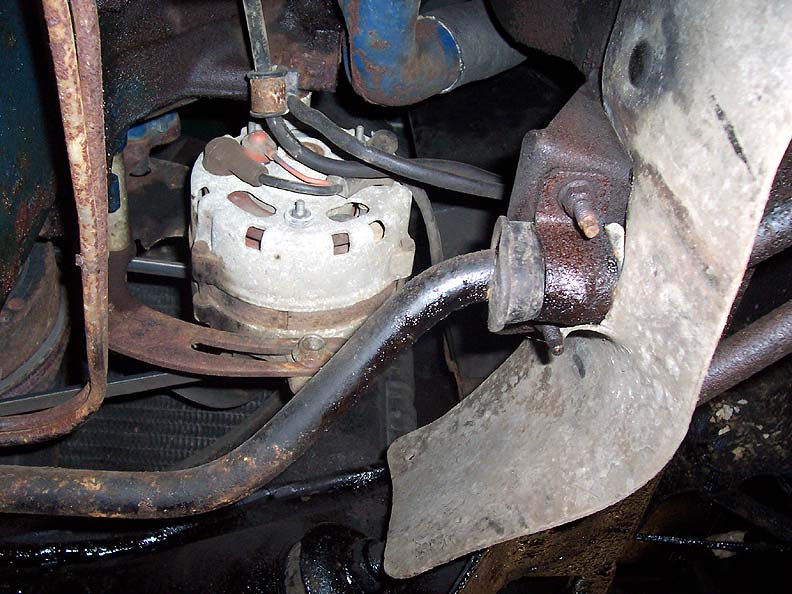
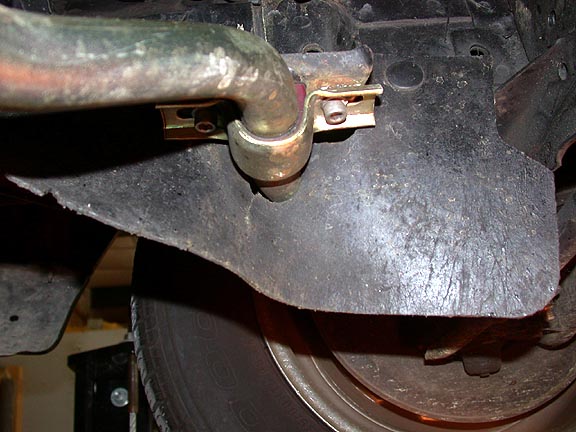
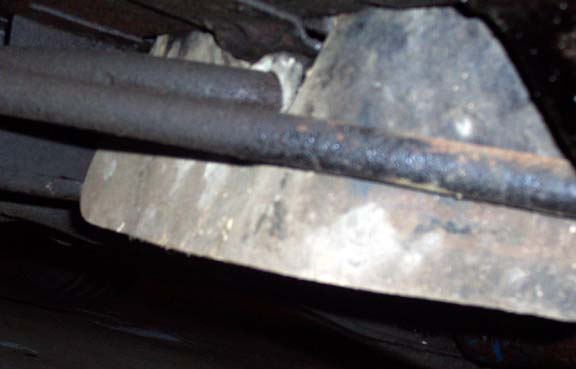
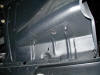
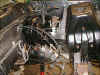
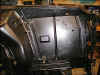
Alternator Splash Shield
This is an ultra-rare 429 Mustang Alternator Splash
Shield. It was made of a sheet of rubberized material and was held in
place by fasteners which mounted into the side of the passenger frame
rail.
|
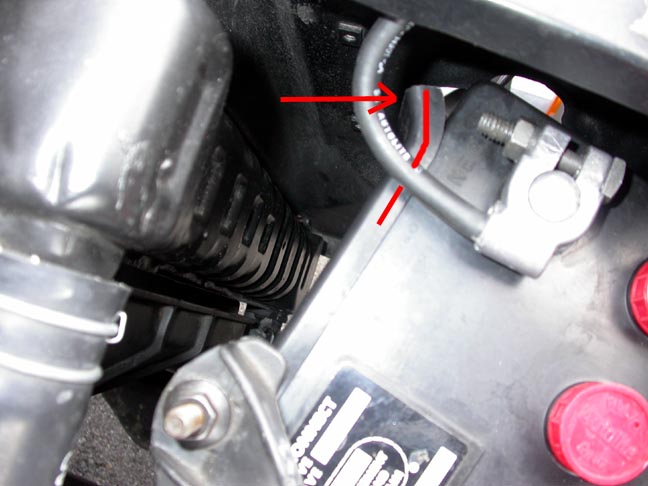
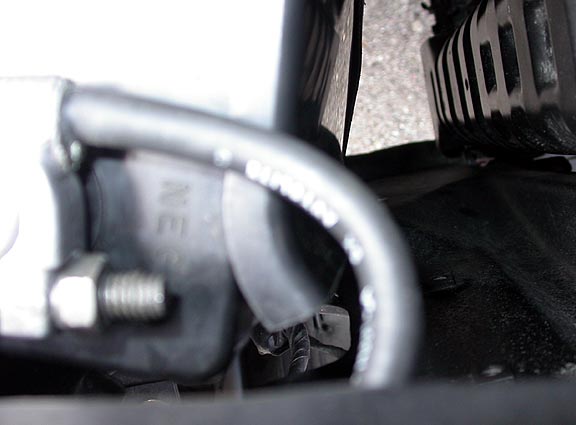
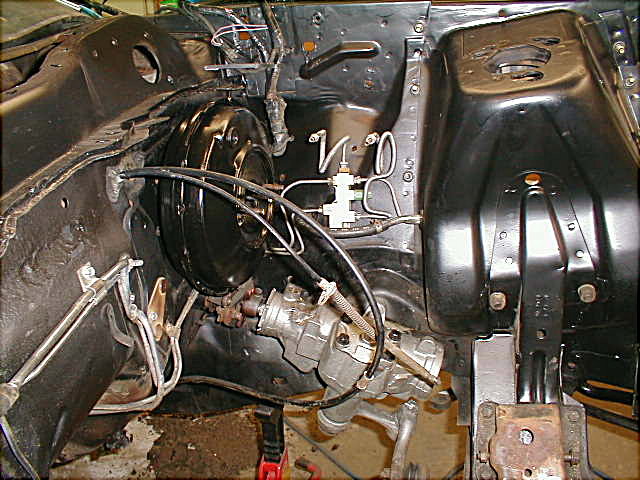
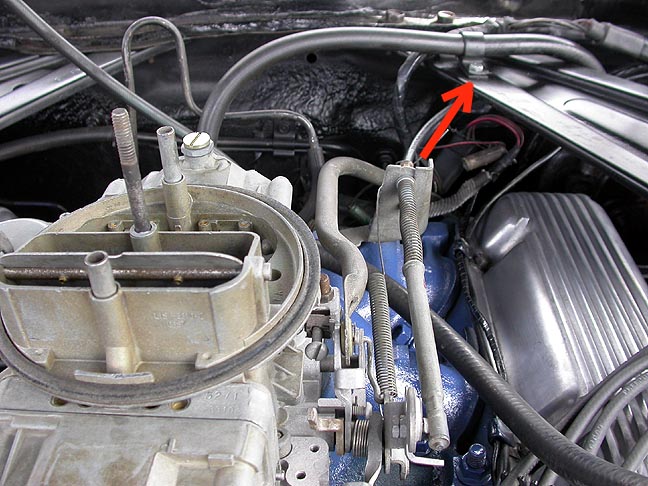
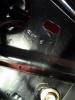
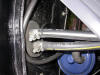
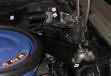
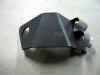
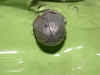
Power Brake Booster Vacuum Hose Retention Strap
The vacuum hose was retain with a small bracket on the
driver's side shock tower brace as shown in the photo above.
|
|
These are the acorn nuts used to secure the molding at
the front edge of the NASA Hood. 7 were required.
|

|