|
Home
Mustang Exterior
Cougar Exterior
| |
Exterior Components
(Note: Click thumbnails to enlarge pictures)
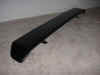

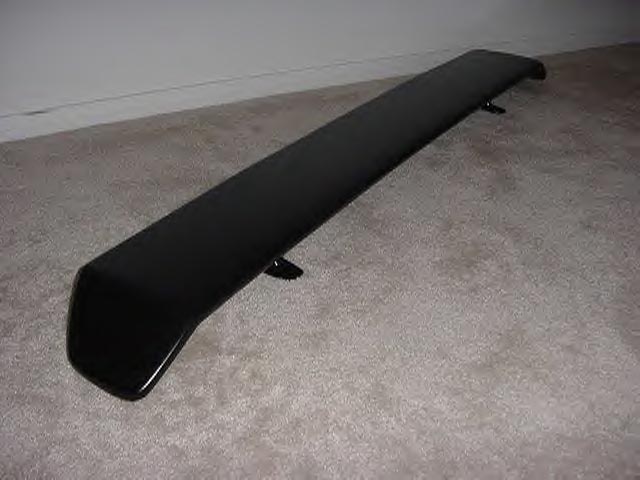
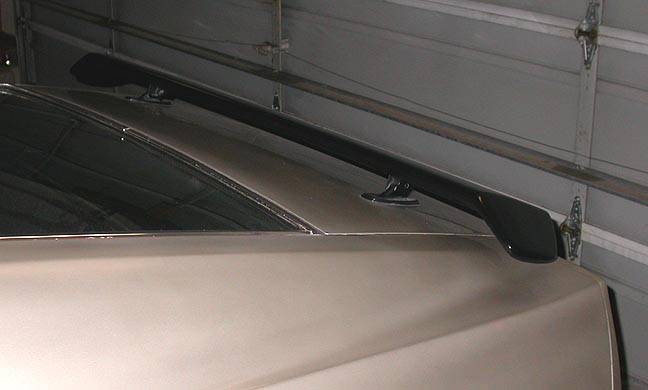
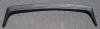
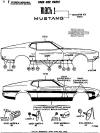
Rear Spoiler
The rear spoiler was a factory option available on the Mach
1, Boss 351 and Sports roof. A low-gloss textured black paint was used on
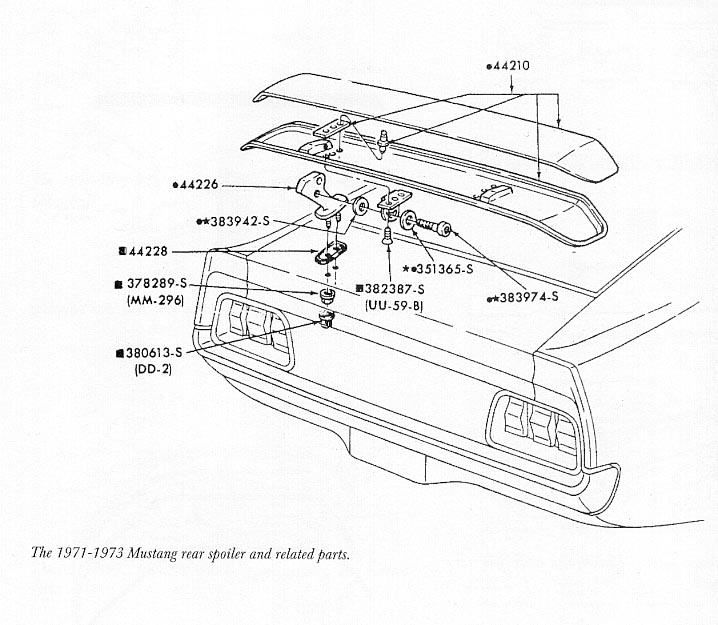
it from the factory. The diagram below shows the spoiler installation.

By the way, if you are adding a rear spoiler
to your to a non spoiler decklid, you will need to change the torsion rods,
otherwise, the extra weight of the spoiler will keep your decklid from
staying propped open when the trunk is open.
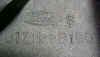
There are two different torsion rods (aka springs) for the Mustang
SportsRoof. The ones without spoiler are (D1ZZ-6344890-A and
D1ZZ-6344891-A). The for use with a spoiler are (D1ZZ-66344890-B and
D1ZZ-6344891-B).
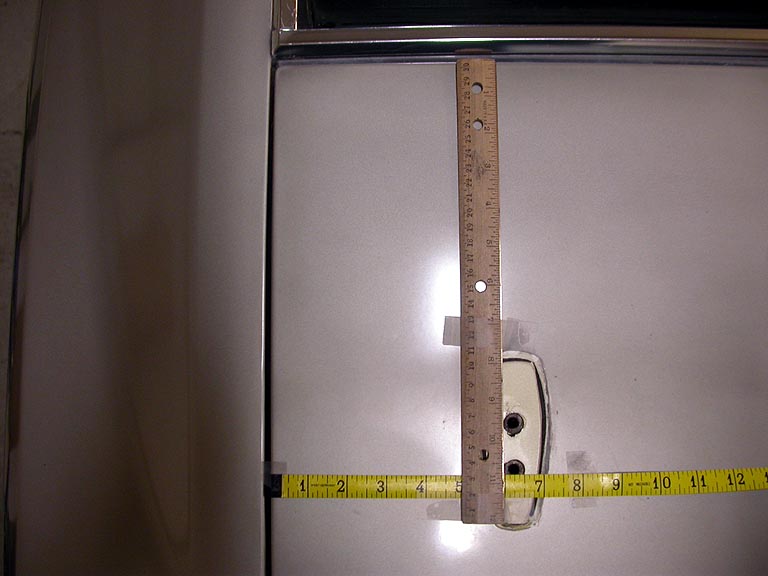
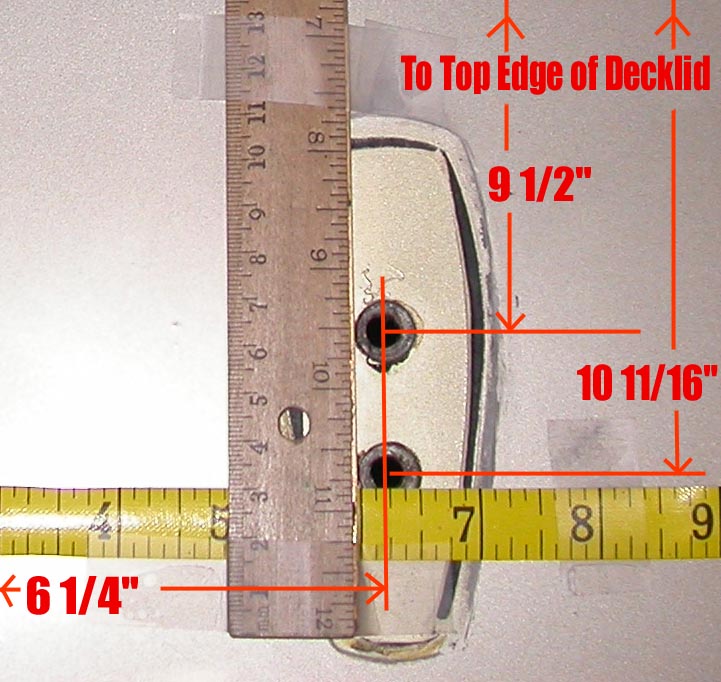
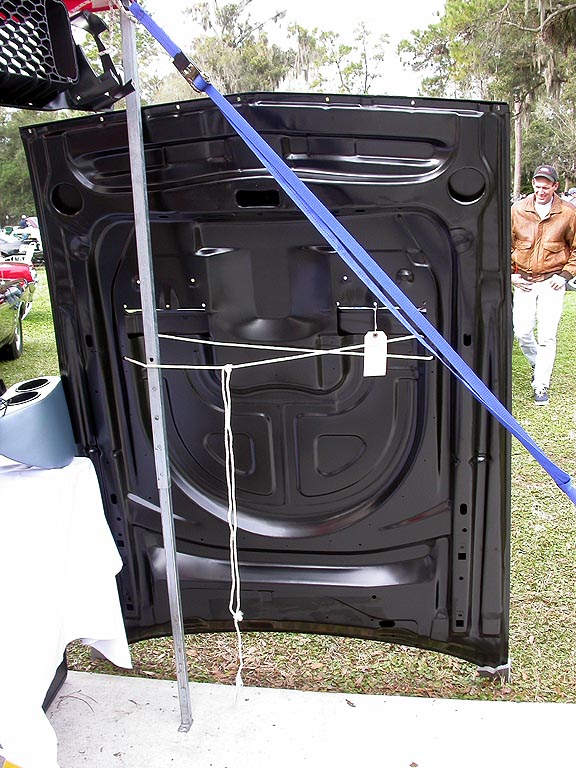
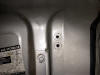
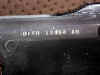
Rear Spoiler Installation Location
If you want to install a rear spoiler on
your 71 Mustang decklid, below are measurements taken on a decklid with a
factory spoiler installation. Measurements of the location of the factory
holes are shown in the photo at left and center left. The holes are centered
6 1/4" inboard of the decklid side edge on both sides. The fore & aft
dimensions are as shown below and apply to mounting pedestals on both sides.
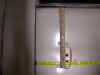
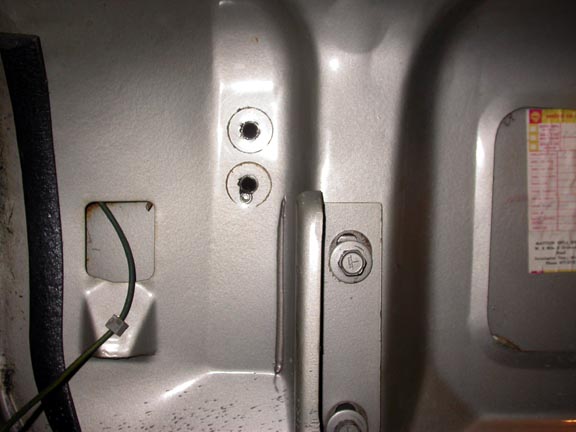
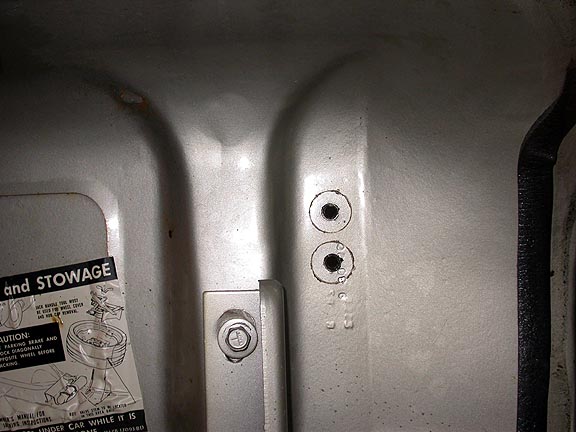
Pictures of hole locations on underside of Decklid
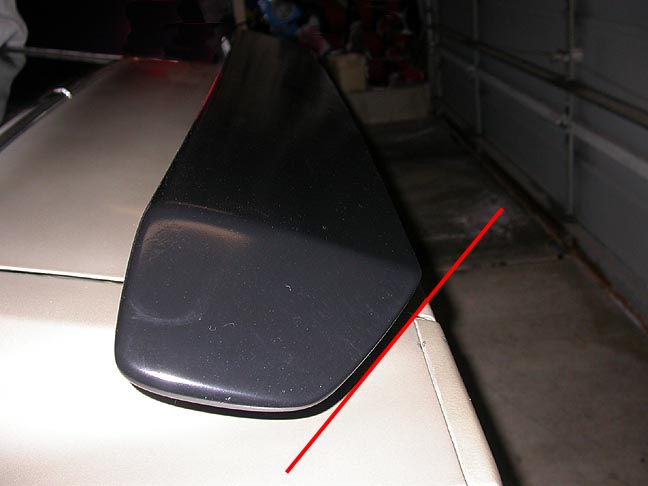
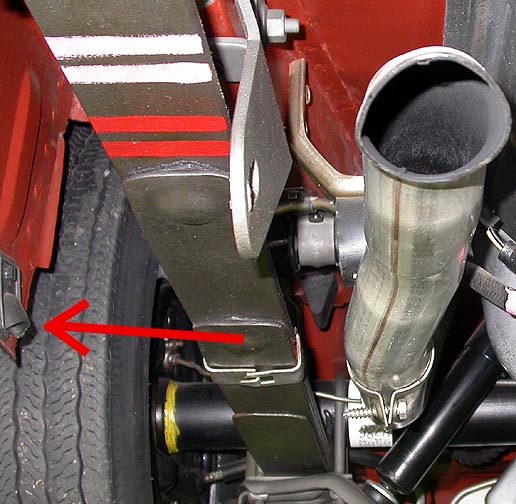
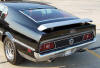
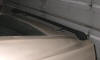
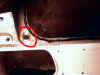
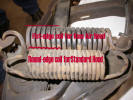
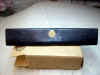
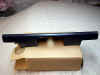
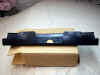
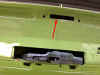
A note about the Correct Front/Rear Edge Orientation of the Spoiler
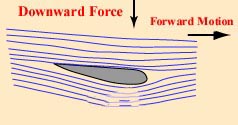
Some 71 - 73 Mustang owners have no idea that they have their spoilers
installed backwards. As shown in the diagram above, the spoiler leading
(front) edge is the thicker side while the trailing (rear edge) should be
the thinner portion of the spoiler. When the spoiler is on correctly, the
trimmed off edge (noted by red line in photo below left) will be at the
rear. Check yours out!

|
 Front Spoiler
The front spoiler was standard only on the Boss
351 in 1971 and could not be ordered from the factory on any other 71
Mustang. However, many were installed at the dealer and by the
customer. The spoiler was either black or argent to match the stripes.
|
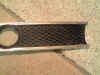
Grill and Components
|
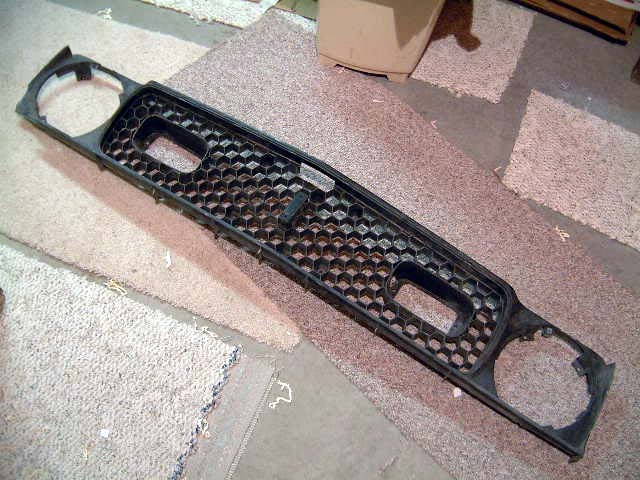
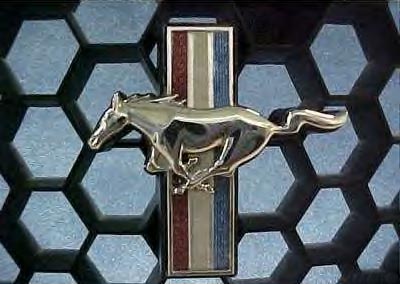
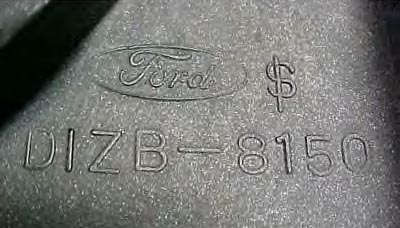
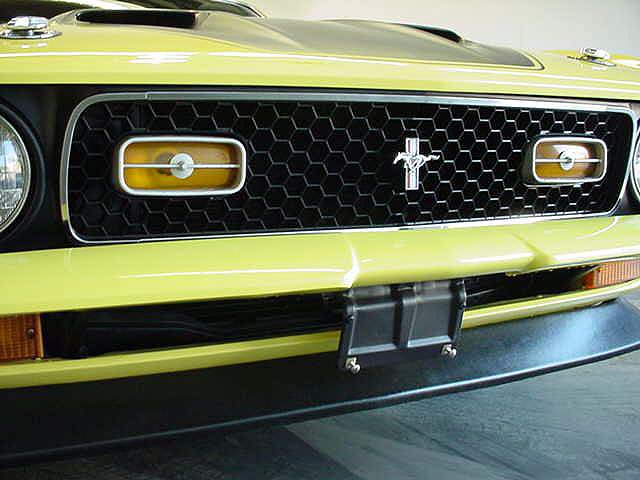
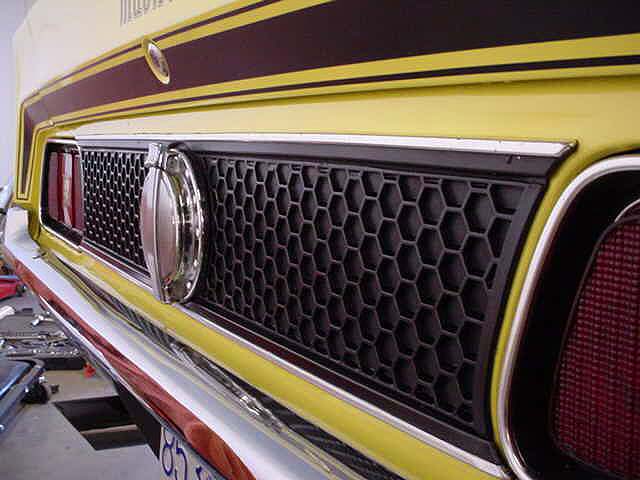
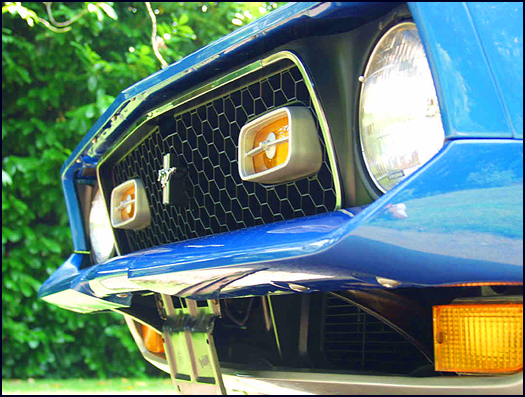
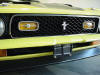
Mach 1 Grill

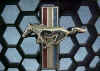
The Mach 1 grill the sport lamps
(D1ZZ-13200-B), running horse
grill ornament (D1ZZ-8213-B) and grill part number are shown above.
|
|
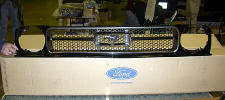
Standard Grill
|
|
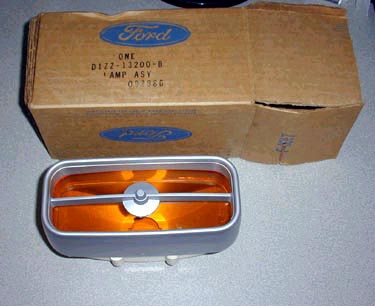
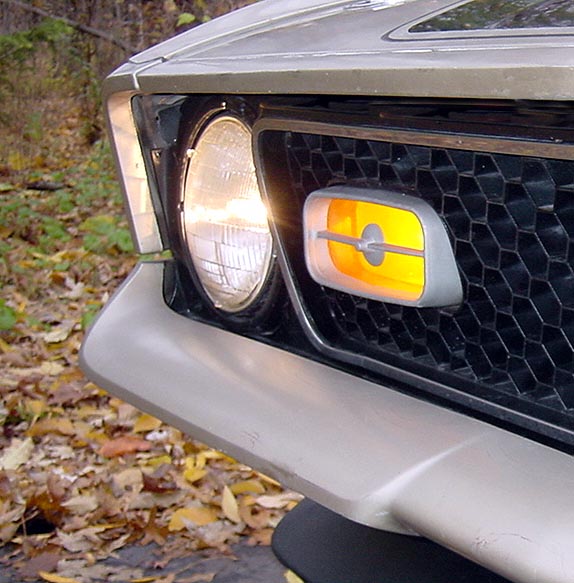
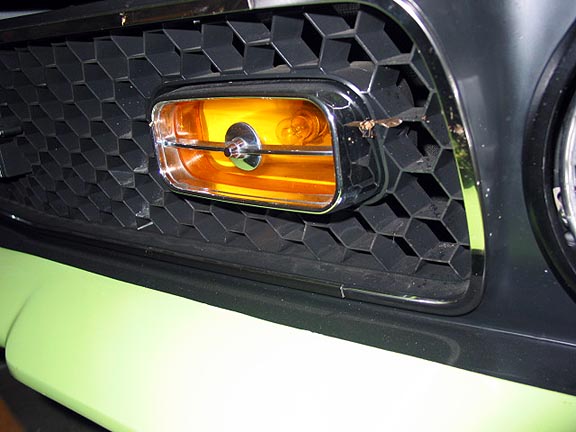
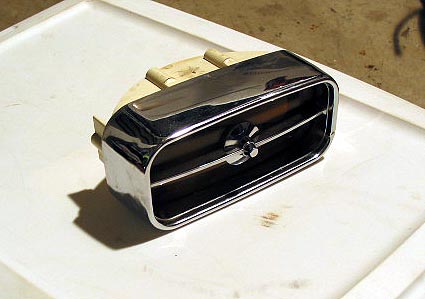
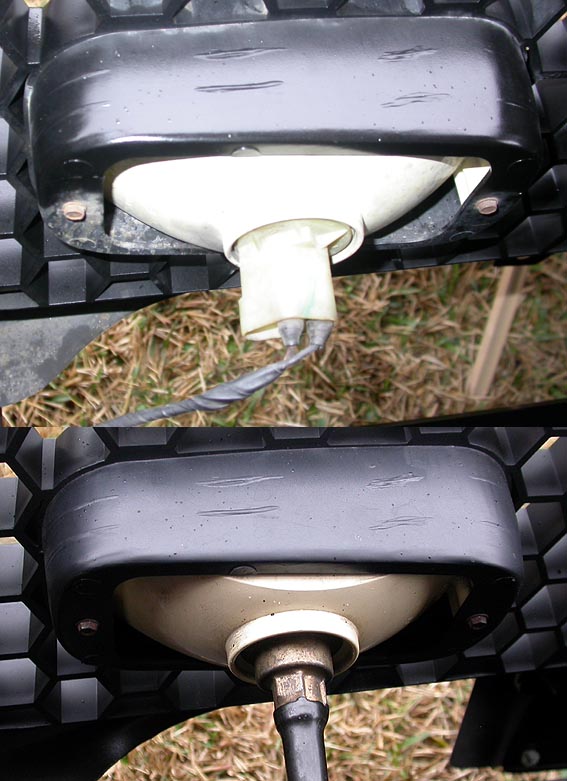
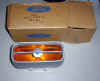
Sport Lamps


The Sport Lamps came as part of the Mach 1 grill.
They only came on when the headlights were turned on (not with the
parking lights). The lamp shown above left with the argent finished
housing was the most common version used from September '70 on.
However, a chromed version (above center and right) was also used on
very early built cars (in August '70).
Sport Lamp Bulb Sockets Two
different bulb sockets were used on the 71 Mustang. Production
started with the metal socket (bottom in photo), then switched over
at a date TBD to the plastic version shown at top.
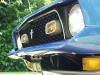
Headlamps
According to Bob Perkins (Mustang Monthly, June 05), the most
correct factory headlamp for the 71 Mustang (Dearborn-built) is the
"Tung-Sol" brand. The only identification on the front of the lamp
is the letters "T.S." at the bottom center. This is the only brand
of headlamp Bob has seen on a '71 Dearborn-built Mustang. The big
three headlamp suppliers to Ford during the '65 - '73 era were G.E.,
Westinghouse and Tung-Sol. All three date coded their headlamps on
the backside, top center, along with the industry number for that
type of lamp.
|
|
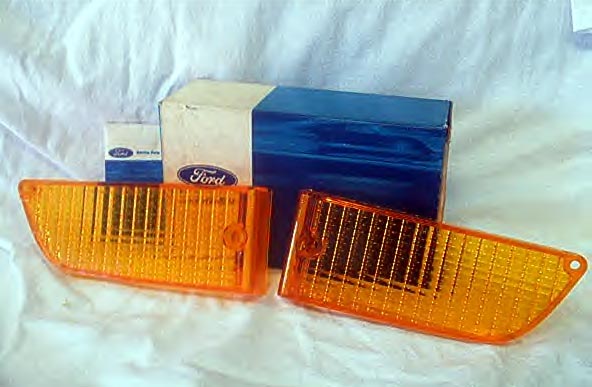
Parking Light/Turn Signal Lenses
|
|
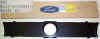
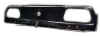
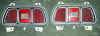
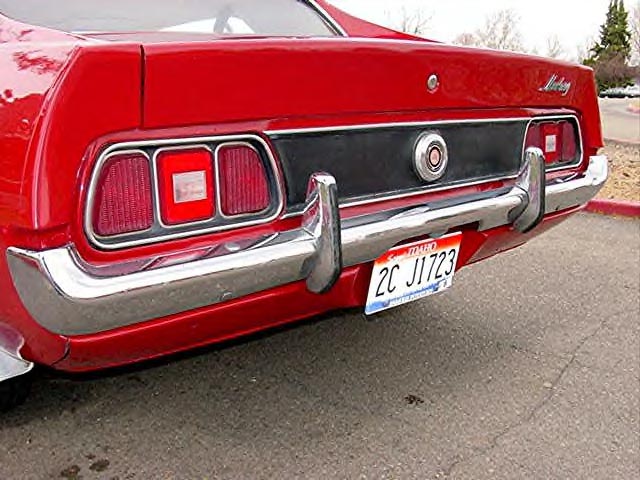
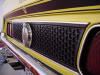
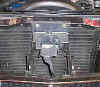
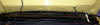
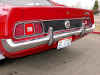
Rear Tail Light Panel
The Mach 1 used the black honeycomb fascia on the rear
panel with a chrome trim strip on the upper and lower edge. The sheet
metal of the rear panel is shown at right along with '71 Mustang tail
lights.
|

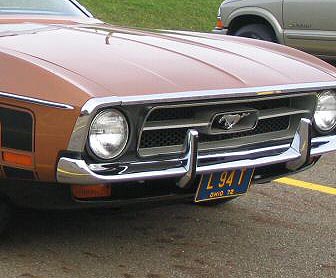
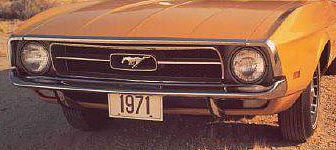
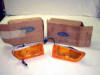
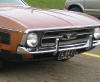
Front Bumper
The 71 Mach 1 came with the urethane front bumper. This
was referred to as the "color-keyed spoiler bumper"
 on the car's Invoice and Window sticker. This did not mean the car came with
a front Spoiler - this was just Ford's wording for the Urethane bumper as
shown above left.
on the car's Invoice and Window sticker. This did not mean the car came with
a front Spoiler - this was just Ford's wording for the Urethane bumper as
shown above left.
All other models of the 71 Mustang came with a chrome
front bumper, as shown above right with the exception of the '71 "Spring
Special", which was a Hardtop that could be ordered with the Mach 1 urethane
bumper and Mach 1 honeycomb grill.
Starting in `72, the Mach 1
honeycomb grill and urethane bumper became part of the Mustang's "Decor
Group" option and could be ordered on the Hardtop and Convertible models of the 72 Mustang.
|
|
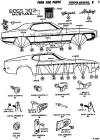
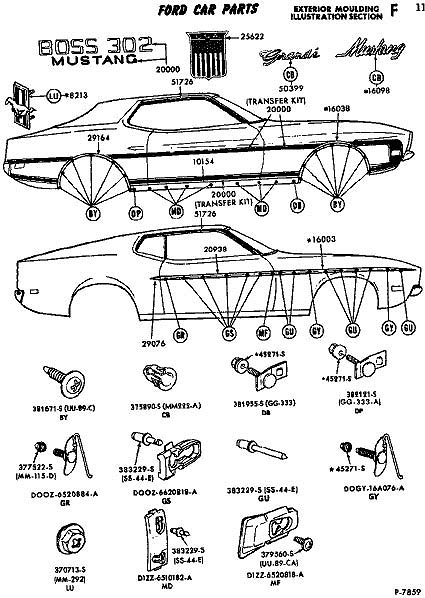
Side Body Moldings
The diagrams above from the MPC show details and
fasteners used on 71 Mustang side body moldings.
|
|
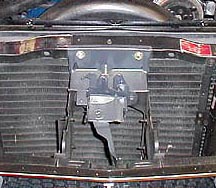
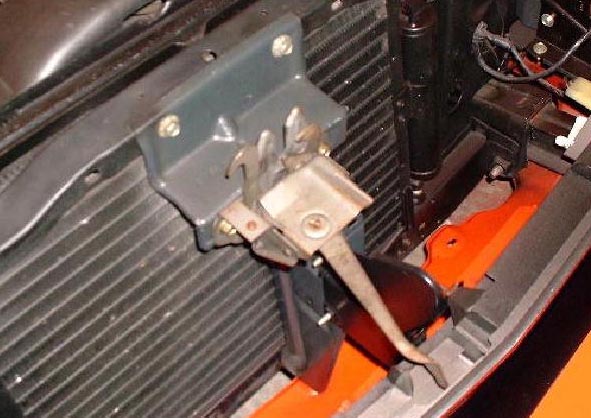
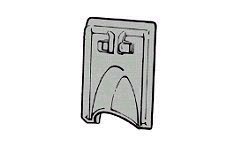
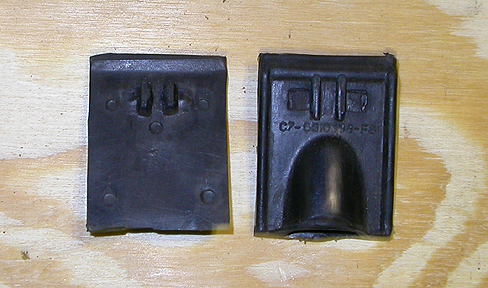
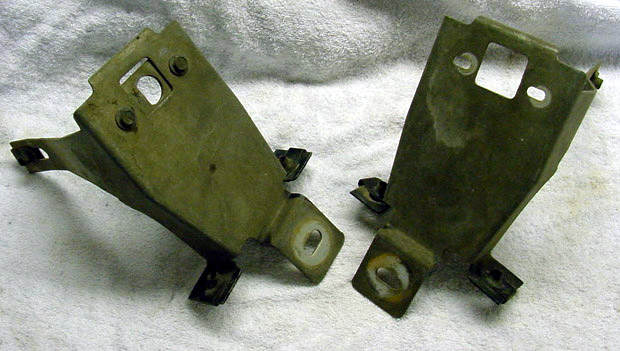
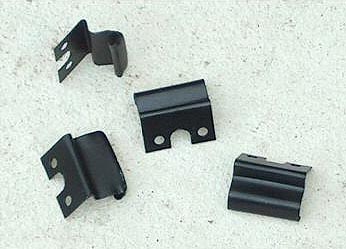
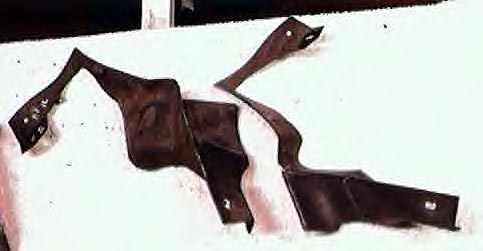
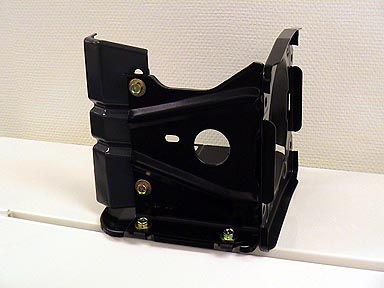
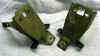
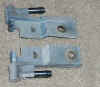
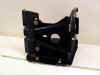
Hood Latch Support
The 71 Mustang used two different hood latch supports.
The version at left and center, with two vertical supports, was used until the
May/June '71 timeframe (exact changeover date note yet determined), at which point the design changed to the single
support version shown at right. |
|
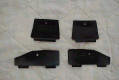

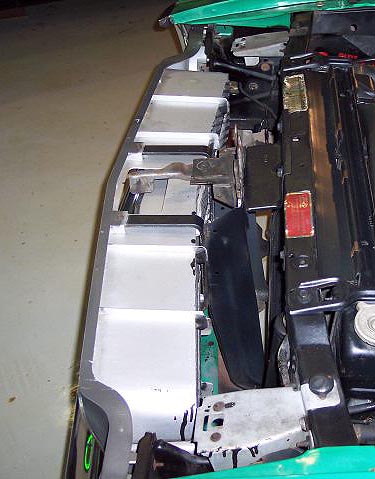
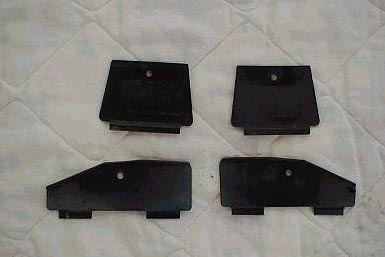
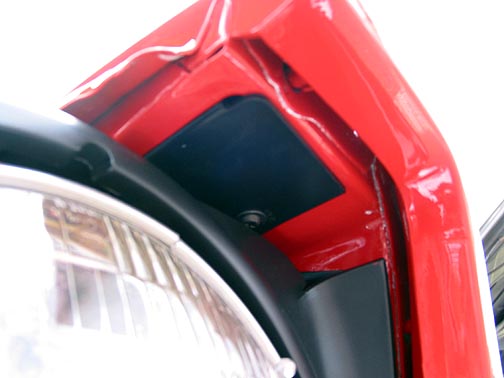
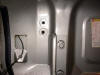
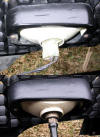
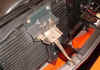
Front Fender Plugs
These plugs were used to plug the openings between the
front fender and the headlight bucket area to block road splash. A view of
these plugs installed is shown at right. |
|
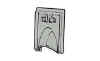

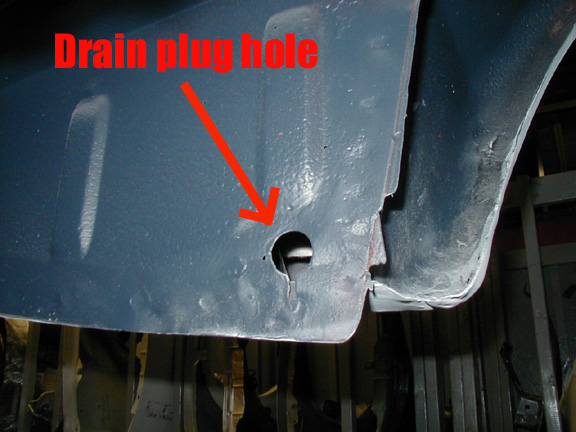
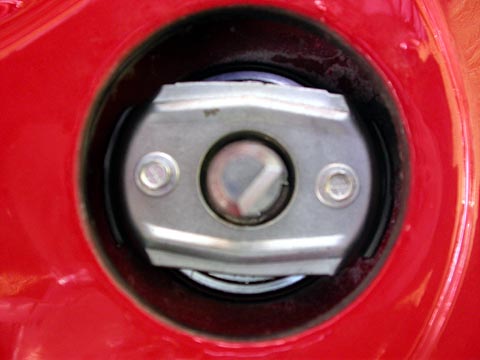
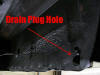
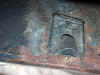
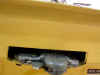
Quarter Panel Drain Plug
A quarter panel drain plug was used from 65-73. The
purpose of this plug was to allow any water that might accumulate in the
trunk to drain out. Also, the plug was designed to prevent ingression of
water from wheel well splash. The photo below left is of the 71 style
quarter panel showing the little square hole in the sheet metal which helped to
hold the 71 plug in place. The 72-73 style used a round hole for the
rubber grommet to snap into. Where else but the 429 Megasite
could you learn details like this ;-)
|
71 Style with square grommet snap-in hole
|
72/73 Style with round grommet snap-in hole |
Below are installed views of the drain plug

 |
|
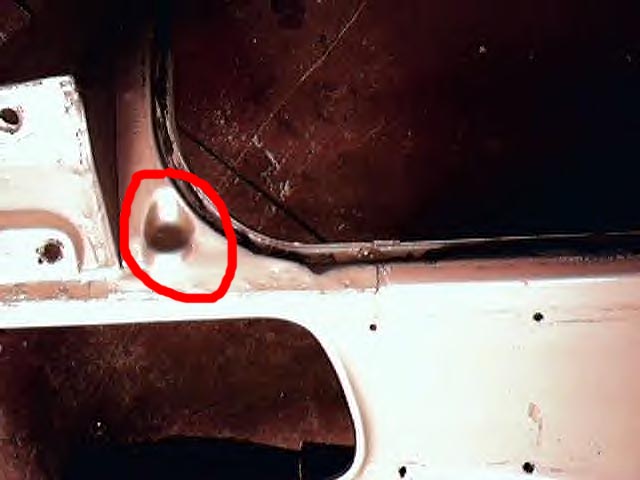
Trunk Dimples
The dimples (circled in red) were only found on '71
Mustangs built through 12/70. |
|


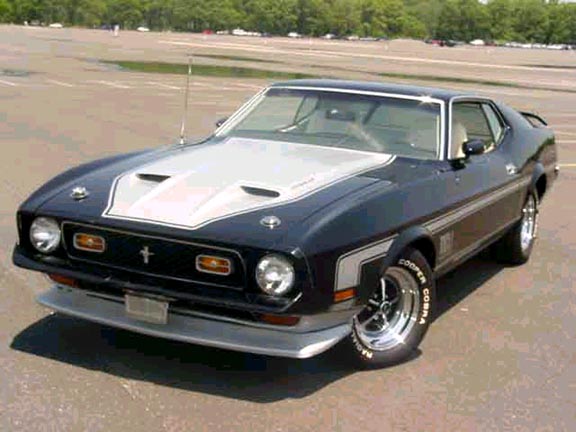
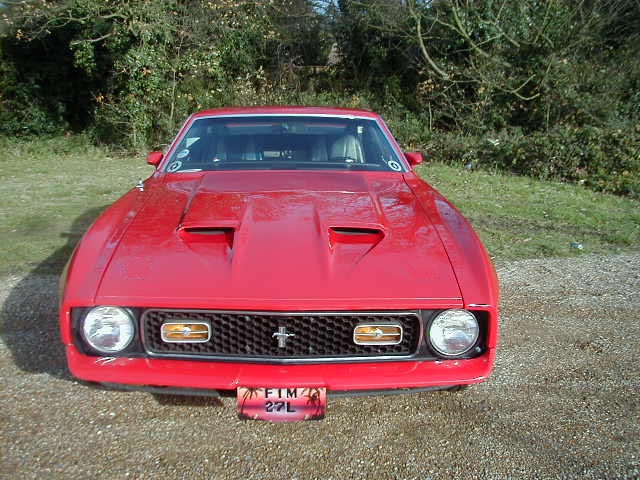
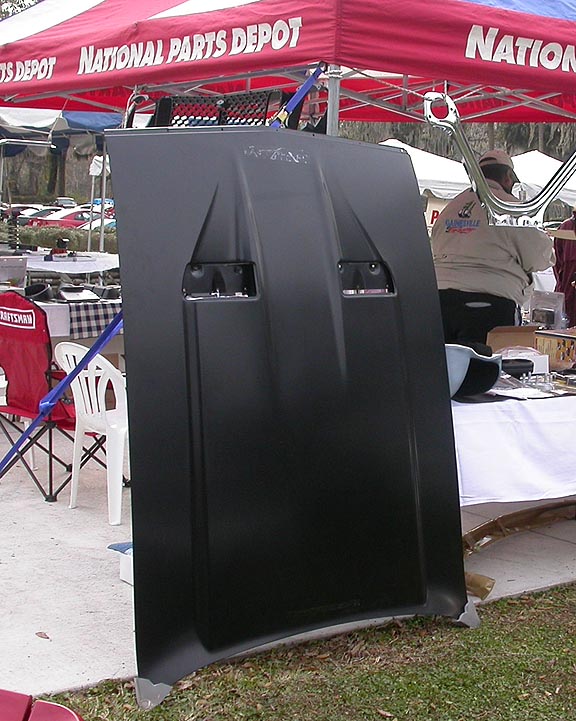
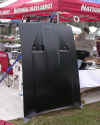
NASA Hoods
All 429 Mustangs, be it Sportsroof, Hardtop,
Convertible, Grande or a Mach 1 received a NASA scooped hood.
All J-code (ram Air) versions got the vacuum actuated
flappers in the scoops and chrome hood pins. If the car was a Mach 1, it
also received the blackout hood treatment (or Argent if a dark colored
car).
All C-code (non ram air) cars received a
non-functional body color NASA scooped hood. The scoops were non
functional on the C code and were blocked with honeycombed blockoffs as
shown in the photo below left.

|
|
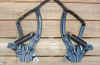
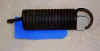
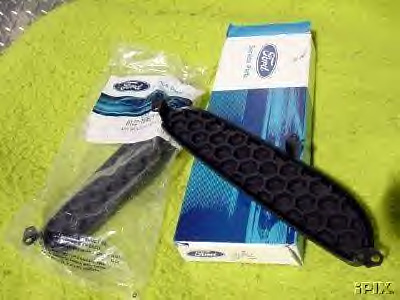
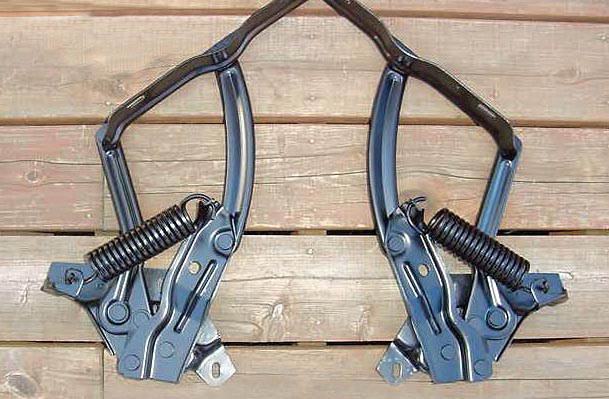
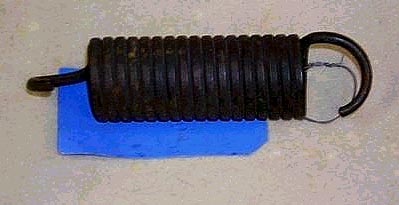
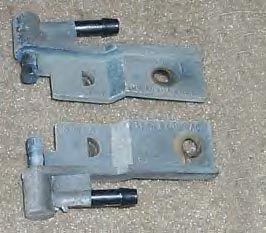
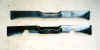
Hood Hinge/Spring
Two different hood hinge springs were used on the 71
Mustang hood. For use with the heavier NASA type hood, a special stronger
spring with flattened coils was used (shown at left in the photo at left
and alone in photo at right). For all other hoods, a lighter duty coil
spring was used with round-cross section coils (shown on the right in the
photo at left). An additional photo is shown
below with a side-by-side comparison of the two springs;
|
|


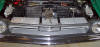
Hood Pins
Chrome Hood Pins came only on cars ordered with Ram Air.
The hood pin brackets (center left and right) mounted to the radiator
support. The pins were retained in the hood by the bracket shown at right.
|
|


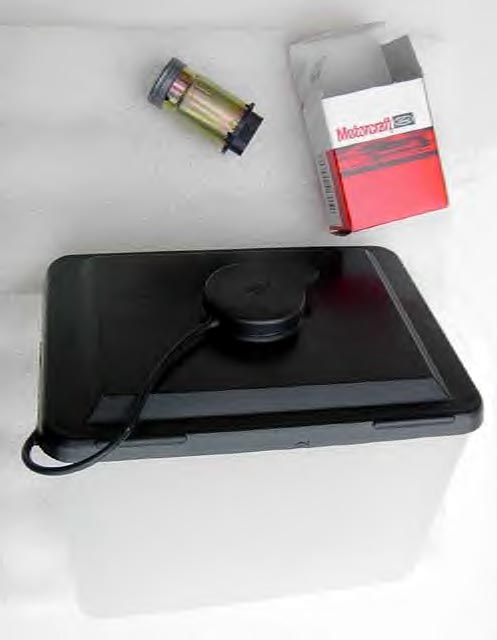
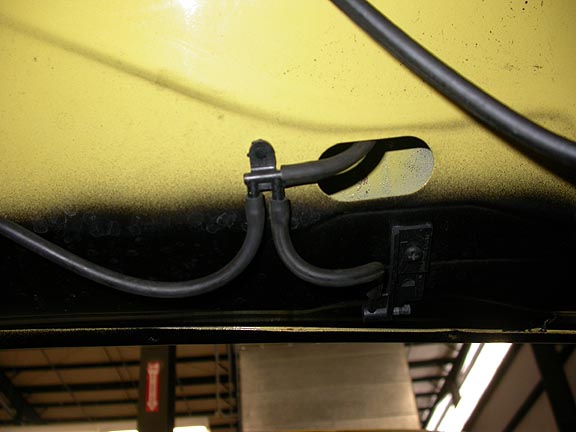
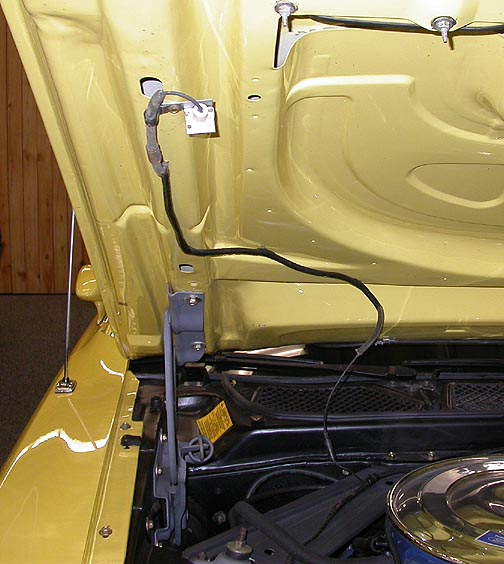
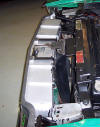
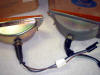
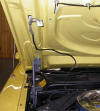
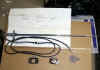
Windshield Washer
The washer bottle, pump and nozzles (which bolted to
the underside of the hood near the windshield) are shown above left and
center. The nozzle installation and washer tube routing is shown right and
right center.
|
|

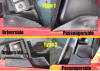
Window Alignment Clips
Note the two clips on front roof
post weather strip molding. One clip is on the outside and the second
clip is about 2-3 inches below that, on the inside. Some time in
'71, it changed to just the one outside clip and remained that way
through 1973.
|
|

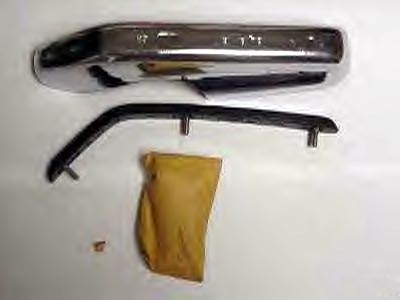
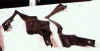
Bumper Guards
There were two different styles of
front guards
used on the front chrome bumper - a high series guard (shown left and
center) and a low series
guard (right). The high series extended above and below the
bumper while the low series guard only went below the bumper. There also was a high
series version used on the back bumper (photo below).
|
|
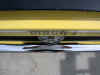
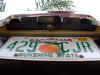
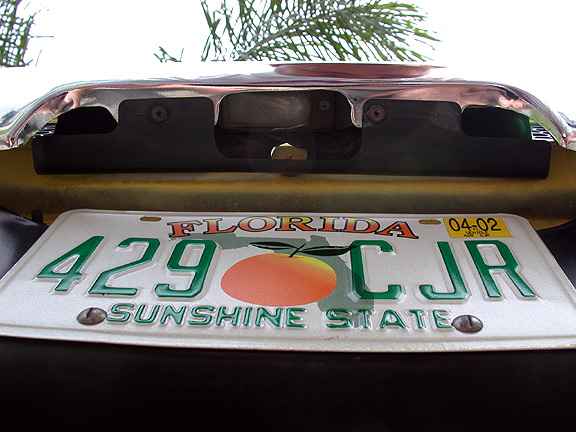
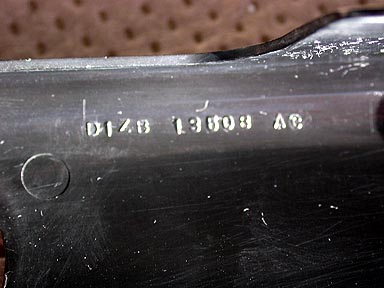
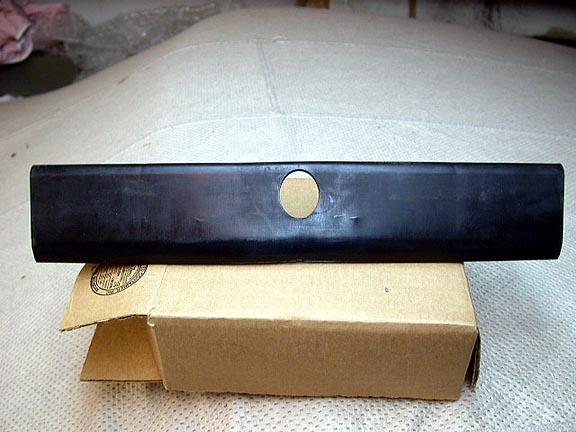
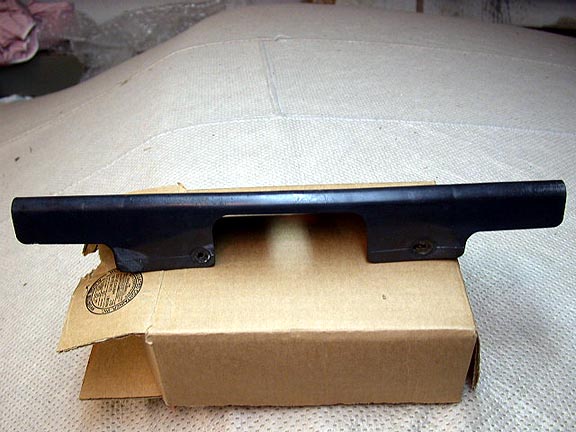
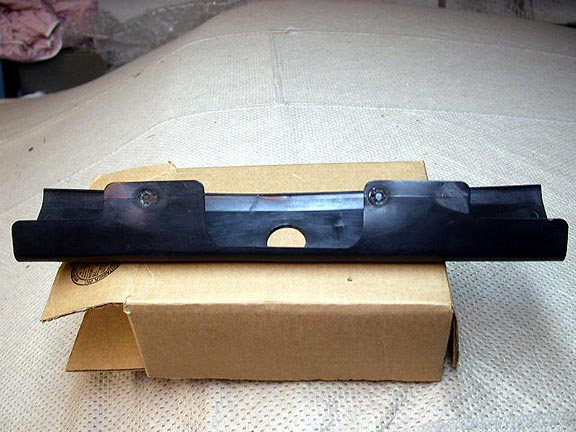
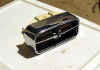
License Plate Bulb Shield
A black plastic shield (part number D1ZB-13608-AC) was used around the license plate bulb
to protect it from the elements and possibly fuel spillage.
In the picture above left, if you look close you can see a dark area between the
bumper and the rear body. That is the shield from the top. The picture at center
shows the shield
from under the bumper. Individual shots of this part are shown below.
|
|
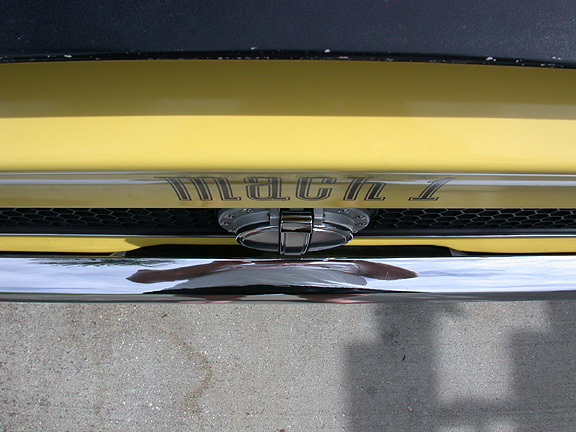
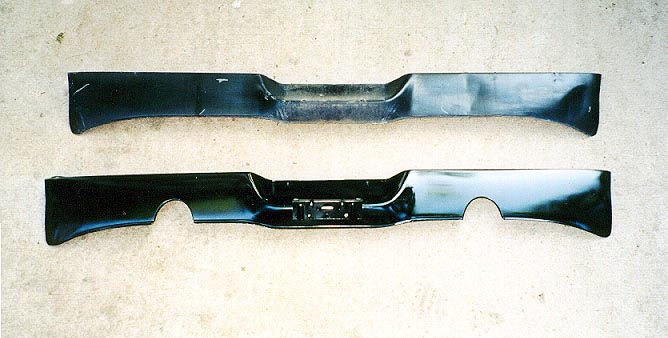
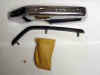
REAR VALENCE The photo
at left shows an installation shot of the chrome exhaust tips used on the rear of the Mach
1 with the special
rear valence with cutouts. The photo at right compares an original valence to a
repro.
|
|
Underhood Lamp
|
|
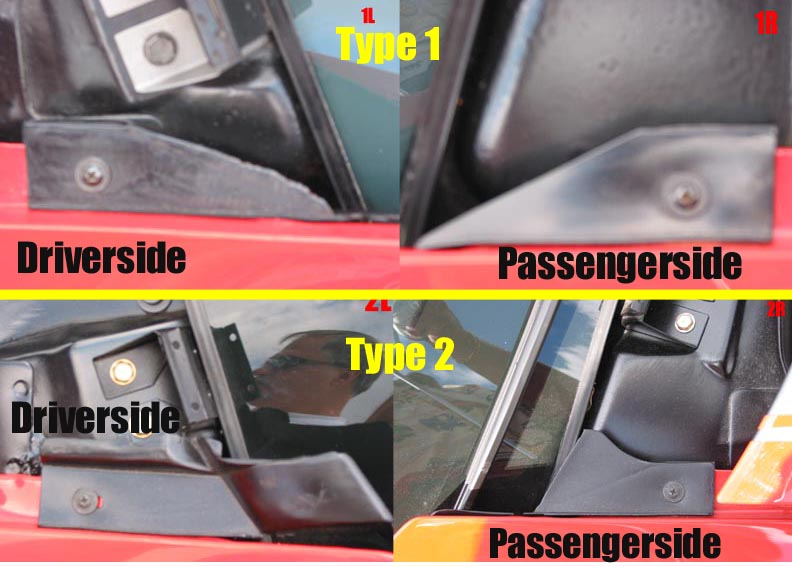
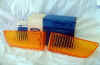
Front Fender Filler Ends
These black plastic fender seals were
used on the ends of the fenders near the windshield post. These seals were only used on cars
built before
6/1/71, so most 71's should have them. Strangely, we have found
two different designs for these parts. Side by side comparison shown above
right.
|
|
Headlight Bucket |
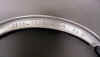
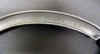
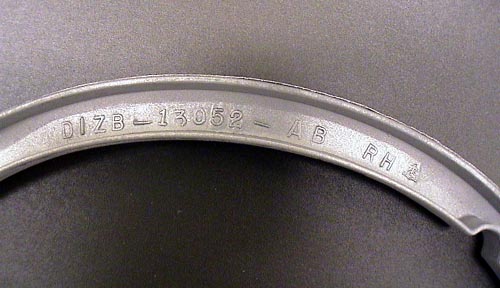
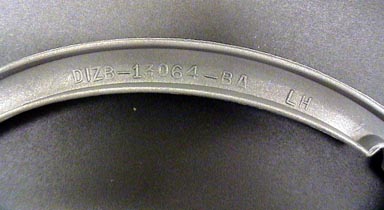
Headlight Trim Rings
The D1ZB-AB was used on the passenger side (RH) and the
D1ZB-BA was used on the drivers side (LH).
|
|
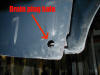
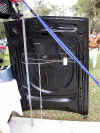
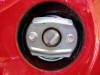
Differences Between '71 and '72 Deck lids
Although the 71 and 72 Mustangs appear identical, there
are some differences. One of them is the deck lid. Starting on 3/1/72, the 1972
deck
lid part number changed from D1ZZ to D2ZZ. With this change, a slot for an
exposed and pop riveted lock cylinder
retaining clip was added as shown by the red arrow in the photo (left). The 71 deck lid (right) does not
have this slot. It has the lock cylinder retaining clip inside
the deck lid sheet metal structure. It is thought that the 71 design,
which required the assembly line worker to put his hand inside the metal
frame work of the deck lid to install the lock cylinder retaining clip,
posed an accessibility problem and possibly a safety issue (sharp metal
edges). These issues may have lead to the design change in 72 with the
much easier and safer slot for external installation of the retaining
clip.
Note that 72 Mustangs built prior to 3/1/72 used the
D1ZZ 71 decklid. |
|
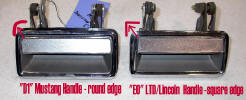

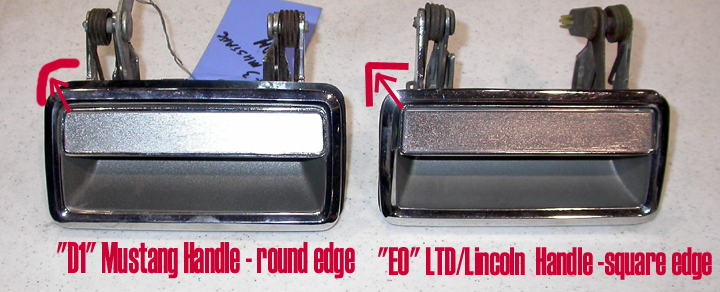
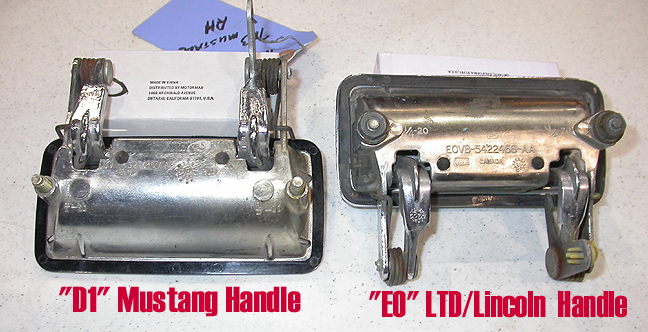
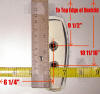
71 Mustang Door Handles
When buying new door handles for your Mustang, note the
difference between the Mustang version and the *very* similar Ford/Lincoln
version. Note that the Mustang version has a rounded edge on the part of
the handle you lift up while the Ford/Lincoln version has a squared edge
as shown in the photos above. Also, look for the D1 part number on the
back for Mustang and the E0 number for Ford/Lincoln. |
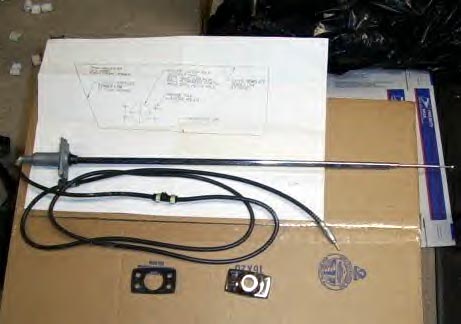
 Telescoping Antenna
The part number for the 71 - 72 antenna is
D1ZZ-18813-A., which is a telescoping design. Note the '73 version (part
number D3ZZ-18813-A is different. It is a non-telescoping design.
Rear Mount Antenna Some owners with
rear mount antennas have asked us whether or not this could have been a
factory installation. Mr. F, of FoMoCo.com
provided the following info on this subject;
| Does anybody out there know the
proper location of the radio antenna for a 1971 Mach 1
Ford's assembly documents, promotional photos, etc.
are unambiguous in showing the R/H fender as the only "factory"
location. And even the dealer's radio installation kit comes with
identical instructions, including a 1:1 template for drilling.
However, it should be pointed out that it was
possible to order a Mustang sans radio. This also meant "less
antenna" and - in at least some model years - the antenna location was
not predrilled. In theory, then, the owner of said car was free to have
an antenna mounted wherever (and whenever) he desired. :-)
---
Mr F |
|
|
|

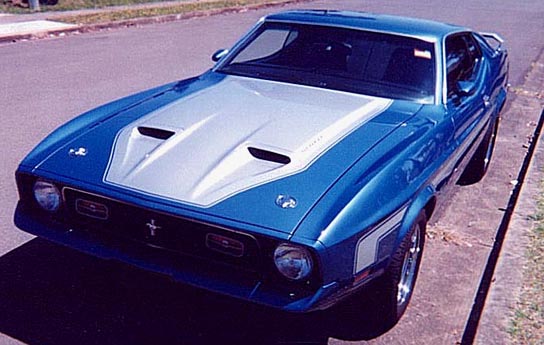
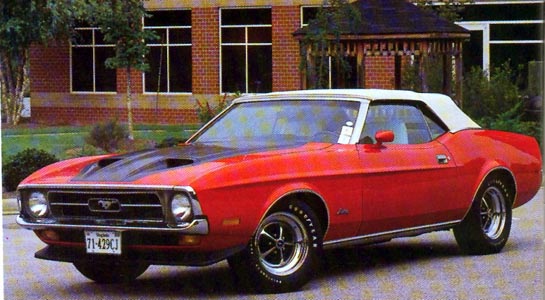
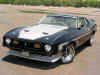
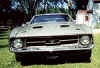
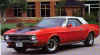
Bruce O'Connor's 429 CJ Mach 1
|